Before Beginning…
- Carefully read the instructions before starting the project
- Pre-wash and press all fabrics before cutting. This will avoid any shrinkage when laundering the finished quilt and will remove any excess dyes
- Replace any fabrics that continue to bleed after washing
- All seam allowances are 1/4 inch and are included in the given measurements
- Press seams as you work, and always press towards the darker fabrics whenever possible be sure to follow the printing instructions on the last page
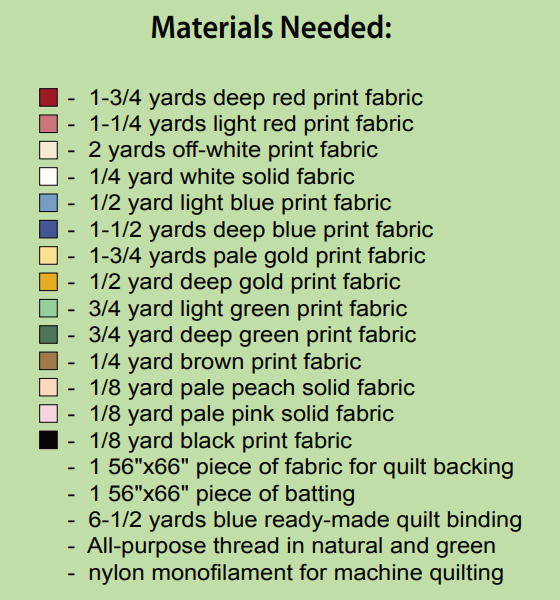
Materials Needed for the Lap Quilt
Lap Quilt Tutorial with Free Quilt Pattern
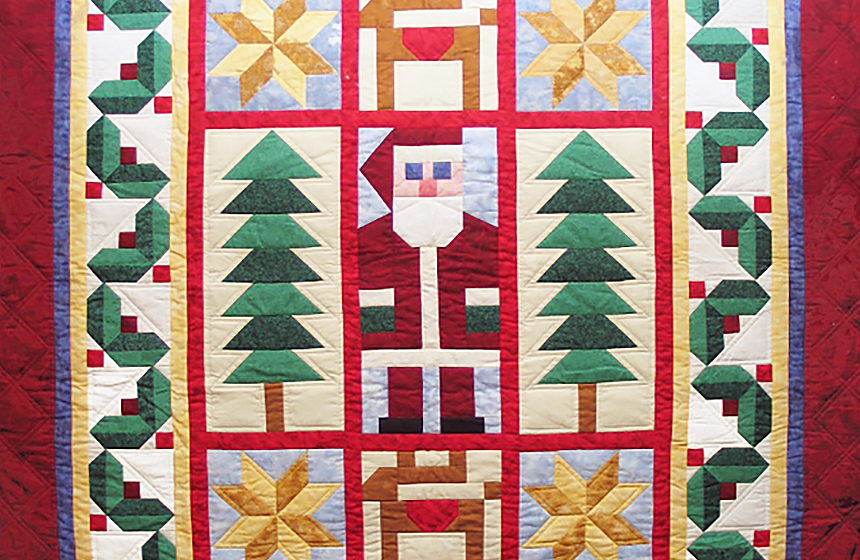
Welcome to the Lap Quilt Tutorial. This time we are going to learn how to make the Santa Claus DIY Quilt.
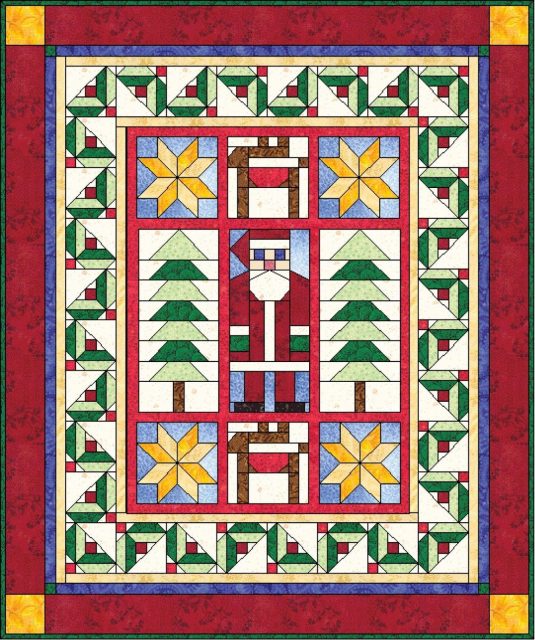
The quilt is to be made of 14 different fabrics. Fat quarters and basically anything you can grab around will do very well. The only requirement is to match the total yardage exactly while borders and sashing make a different story and must be of specific dimensions.
This long-stitch guide will walk you through the detailed patterns and directions for making this 52″ wide x 62″ long lap quilt.
This is a piece-by-piece guidance that includes 8 parts and full-size patterns. The number of those small parts is not a reason to get scared. The DYI quilt requires no special or excessive effort and skills to quilt the pieces. This tutorial explains everything to the slightest details keeping it small and easy-to-follow.
Please beware this work requires the patterns to be printed full size.
To get assisted with your printer parameters, refer to the Full-Size Printing Test Page section at the end of this stitch guide. Please note the patterns would not match well and the borders would not fit unless you print them full-size.
Full-size printing goes in a breeze, it just takes you to adjust printing settings a bit. That might sound boring, but consider the knowledge you gain and the skill of customizing your devices…
Part 1 – Materials List and Color Key
Collect the required materials. Prior to initiating the stitching and quilting, wash and press the fabrics. This pre-treatment will avoid any shrinkage in follow-up treatments of the product and will remove any excess dyes.
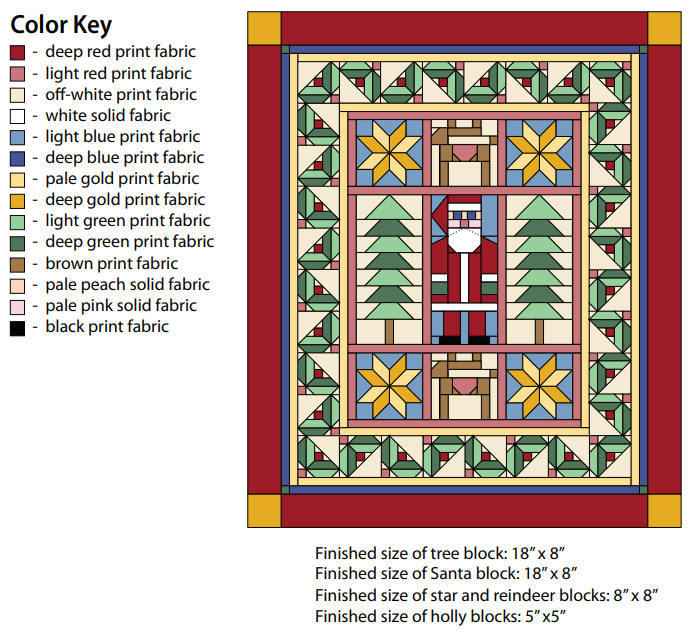
The colors appearing in the List match the Color Key as available below.
Part 2 – Cutting the borders and sashing, cutting and piecing the Holly Blocks
In this Part we are focusing on two activities:
- Cutting the sashing and border strips (keeping them for Part 7)
- Cutting and assembling the Holly Blocks
The measurements provide for (and observe) 1/4 inch seam allowances. Press seams as you work, and always press towards the darker fabrics whenever possible. Smaller pieces can be finger pressed as you stitch to save time and trips to the ironing board.
Step 1 – Cut the Sashing and Border Pieces
- Cut the Borders, Sashing and Cornerstones: From the light red print fabric cut four (4) strips 1-1/2″ x 18-1/2″, 8 strips 1-1/2″ x 8-1/2″ and four (4) strips 1-1/2″ x 28-1/2″ for the sashing.
- From the pale gold fabric, cut two (2) strips 1-1/2″ x 38-1/2″ for the interior border side strips and two (2) strips 1-1/2″ x 30-1/2″ for the interior border top and bottom strips. Cut two (2) 1-1/2″x52-1/2″ strips for the first outer border side strips and two (2) strips 1-1/2″ x 40-1/2″ for the first outer border top and bottom strips.
- From the deep blue fabric, cut two (2) strips 1-1/2″ x 52-1/2″ for the second outer border sides strips and two (2) strips 1-1/2″ x 42-1/2″ for the second outer border top and bottom strips. Cut four (4) squares of deep green fabric 1-1/2″ x 1-1/2″ for the second outer border cornerstones.
- From the deep red fabric, cut two (2) strips 4-1/2″ x 54-1/2″ for the third outer border side strips and two (2) 4-1/2″ x 44-1/2″ strips for the third outer border top and bottom strips.
- Cut four (4) squares of deep gold 4-1/2″ x 4-1/2″ for the third outer border cornerstones.
- Set the sashing strips, borders, and cornerstones aside while you assemble the blocks.
Step 2 – Cut and Assemble the Holly Blocks
- From the deep red cut thirty-two (32) A squares from the deep red, thirty-two (32) A squares from the light red, sixty-four (64) ii pieces from light green and sixty-four (64) ii pieces from the deep green. From the off-white cut one hundred ninety-two (192) B triangles, and thirty-two (32) jj triangles.
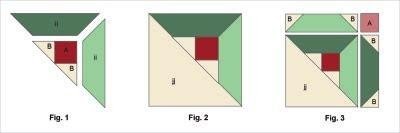
- Referring to the diagram above, stitch two B triangles to each red A square. Stitch one light green and one deep green ii piece to each side of the A/B unit to make a triangle unit (Fig. 1).
Stitch one jj triangle to each triangle unit to make a berry square (Fig. 2). - Stitch one B triangle to each end of the green ii pieces. Stitch the deep green ii unit to the left side of each berry square. Stitch one light red A square to the right-hand side of the light green ii unit and stitch this unit to the top of the berry square to make a block.
Part 3 – Cutting and piecing the Star Blocks
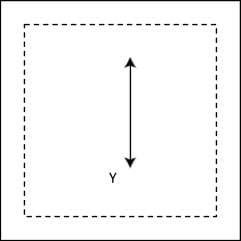
- From the pale gold fabric cut sixteen (16) aa pieces. Reverse the pattern and cut an additional sixteen (16) aa pieces reversed from the deep gold fabric. From the deep blue fabric cut sixteen (16) Y squares and sixteen (16) bb triangles.
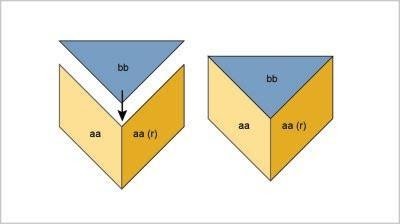
- Seam allowances are 1/4-inch for this project. Set in one bb triangle between one pale gold aa piece and one deep gold aa piece to make the star units. Finger press the seam allowances towards the blue fabric. Make 16 of these units (Fig. 4).
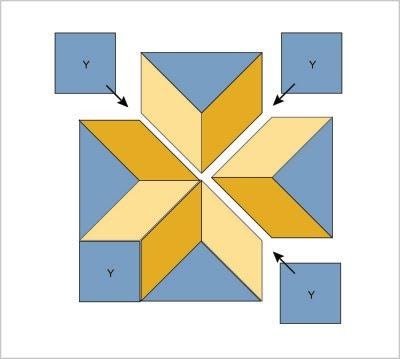
- Stitch four of the star units with 4 of the blue Y squares to make a block. Finger press the seam allowances towards the blue fabric. Make 4 of these blocks (Fig. 5).
TIP: Patterns for the set-in pieces, such as the bb, Y and aa pieces have a dot in the seam line where intersecting seam allowances converge. When setting in these pieces, stitch just to the circles indicated on the pattern pieces. This allows for pucker-free set-in seams. Do not stitch into the intersecting seam allowances!
Part 4 – Cutting and piecing the Reindeer Blocks
Cut the pieces:
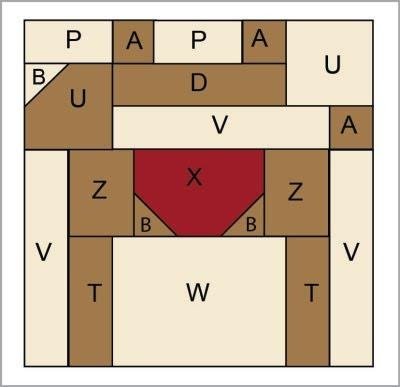
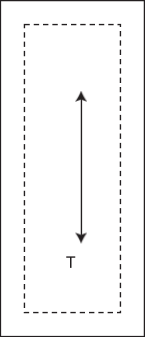
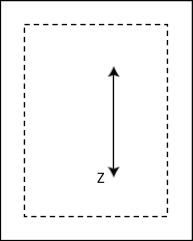
- From the brown fabric cut six (6) A squares, four (4) B triangles, four (4) T rectangles, two (2) U pieces, two (2) D pieces, and four (4) Z rectangles.
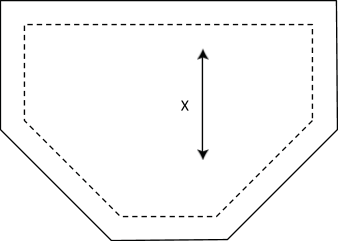
- Cut two (2) X pieces from the deep red fabric.
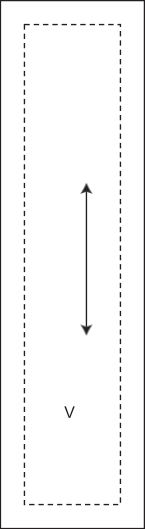
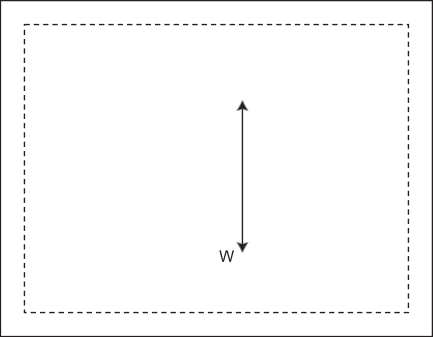
- From the off-white fabric cut four (4) P pieces, two(2) U squares, two (2) B triangles, two (2) W rectangles and six (6) V strips.
Assemble the Blocks:
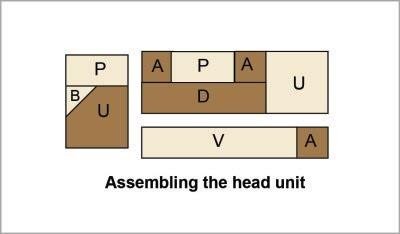
- Using 1/4 inch seam allowances throughout, stitch together the two head units (Fig. 6) and two body units (Fig. 7).
- Press the seam allowances towards the darker fabrics.
- Stitch the head units and body units together to make a block.

Part 5 – Cutting and piecing the Tree Blocks
Next, we’ll cut and assemble the two long Tree Blocks that will flank the center block.
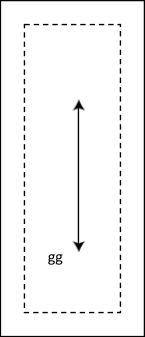
- From the deep green fabric cut six (6) ee pieces. From the light green cut six (6) ee pieces and two (2) cc pieces. From the brown fabric cut two (2) gg pieces.
- From the off-white fabric cut four (4) hh rectangles, two (2) dd pieces and two (2) dd pieces reversed (r), twelve (12) ff pieces and twelve (12) ff pieces reversed (r).

- Stitch a dd and dd(r) piece to each side of the cc pieces to make the tip of the tree (fig. 8).
- Stitch an ff and ff(r) piece to each side of the ee pieces to make the branches (Fig. 9).
- Stitch one hh to each side of the gg pieces to make the trunk unit (Fig. 10).
- Stitch together one tree tip with 3 light green and three deep green branch units and one trunk unit as shown to make a tree block (Fig. 11).
Part 6 – Cutting and piecing the central Santa Block
In this part of the Lap Quilt Tutorial, we are making the Santa block. The block fills the middle of the quilt. It is the largest among the block to be made. This is also the final block. Upon completing it, we are going to assemble the quilt top.
The block consists of individual sections including the hat, left and right arms, the center body, head, and leg sections.
We have already cut and assembled the holly blocks, star blocks, the reindeer and tree blocks. If you have missed any part of the SAL, click the link for the main SAL page given in the paragraph below.
Cut the following pieces for the single Santa Block:
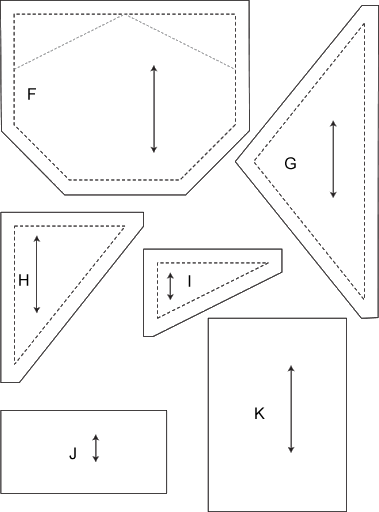
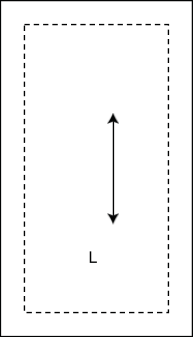
- From the light blue print cut two (2) A pieces, two (2) L pieces, one (1) D piece, one (1) I piece and one (1) reversed (r) I piece, one (1) H piece and one (1) reversed (r) H piece and one (1) S piece.
- From the deep blue fabric cut two (2) A pieces.
- From the pale peach fabric cut three (3) C pieces and two (2) E pieces.
- From the pale pink fabric cut one (1) A piece.
- From the black fabric cut two (2) J pieces.
- From the deep green fabric cut two (2) P pieces.
- From the off-white fabric cut one (1) F piece. Transfer markings to the piece.
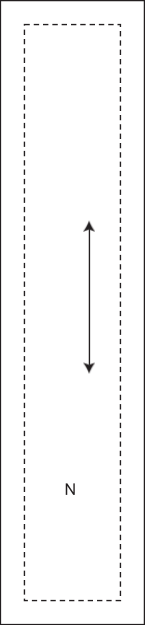
- From the white fabric cut one (1) D strip, one (1) M strip, one (1) N strip and two (2) P strips.
- From the red fabric, cut one (1) R piece and one (1) reversed (r) R piece. Cut two (2) O pieces, one (1) G piece, one (1) D piece, two (2) B pieces, two (2) P pieces, and two (2) K pieces.
Assemble the Santa Block:
Using a 1/4″ seam allowance and off-white thread, assemble the block.
To make Santa’s hat section:
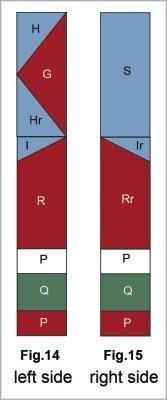
- Stitch one blue H and one reversed H to the red G triangle (Fig. 12).
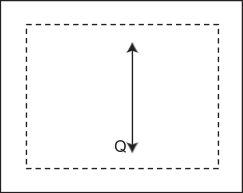
- Stitch one blue L to one red R, white P, Green Q, and one red P piece to make Santa’s left arm (Fig. 13).

- Stitch the hat section above the arm unit to make a strip. This is the left-hand side of the Santa block (Fig. 14).
- Assemble Santa’s right-hand side by making a mirror image of Santa’s left arm (using the reversed I and R pieces) and topping off with a blue S piece (Fig. 15).
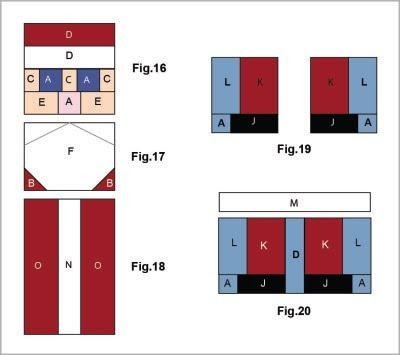
- Stitch one red and one white D strip together. Alternate two deep blue A pieces with 3 pale peach C pieces. Stitch one pale peach E piece to each side of one red A piece. Stitch these three units together to form Santa’s head (Fig. 16).
- Stitch one red B triangle to each lower corner of the white F piece. transfer markings to F piece (Fig. 17) to make the beard section. Stitch one red O piece to each side of the white N piece to make the belly section (Fig. 18).
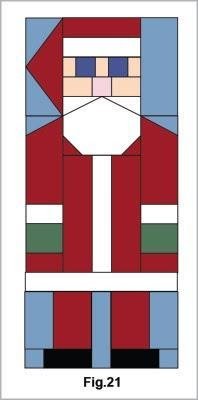
- Stitch the head section, beard section, and belly section together to form Santa’s body. Stitch the left and right arm section to Santa’s body.
To make the leg sections:
- Stitch the L, K, A and J units together – one facing left and one facing right (Fig. 19).
- Stitch the leg sections to each side of the blue D strip and stitch the white M strip across the top of the resulting unit (Fig 20) to make the leg section. Stitch the leg section to Santa’s body section (Fig. 21) to complete the Santa Block.
Part 7 – Assemble the Center Area
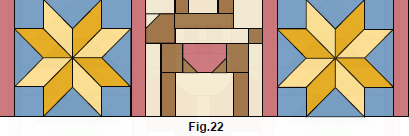
You will now use the red sashing strips you cut in Part 2, Step 1 and had set aside. To make a star row, stitch two star blocks and one reindeer block alternately with 4 of the 8-1/2″ sashing strips. Make two of these rows (Fig. 22).
To make the Santa row:
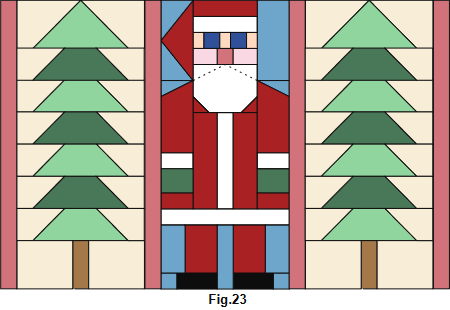
- Stitch the two tree blocks and the center santa block alternately with the four 18-1/2″ sashing strips. Make one row (Fig. 23).
- Stitch the 3 rows you just made alternately with the 4 remaining sashing strips to form the quilt center, having a star row above and below the central Santa row.
- Stitch the 38-1/2″ pale gold strips (refer to step 1 if necessary) to the side edges of the quilt center. Stitch the 30-1/2″ strips to the top and bottom edges.
- Stitch 8 holly blocks together, varying placement, to make the holly border strips. Make four of these strips (Fig. 24)

- Stitch one strip to each side edge of the quilt center. Stitch the remaining two strips to the top and bottom edges.
- Stitch the pale gold 40-1/2″ strips to the top and bottom edges of the quilt center. Stitch the 52-1/2″ strips to the side edges.
- Stitch one of the blue 52-1/2″ border strips to each side edge of the quilt center. Stitch one green 1-1/2″ square to the ends of the two remaining blue border strips and stitch these to the top and bottom edges of the quilt center.
- Stitch one of the deep red 54-1/2″ border strips to the side edges of the quilt center. Stitch a deep gold 4-1/2″ square to the ends of the two remaining border strips and stitch these to the top and bottom edges. This completes the quilt top.
Part 8 – Assemble and Finish the Quilt
- Layer the quilt top with the batting and backing. Hand- or in-baste the layers together to prepare for quilting.
- Using all-purpose thread in the bobbin and the nylon monofilament (or machine quilting thread) in the upper part of the machine, machine quilt “in the ditch” along all seam lines.
- Quilt again 1/4-inch from all seams – or quilt as desired.
- Quilt along the markings on Santa’s beard to give him a mustache.
- Machine stitch 1/8-inch from the raw edges of the quilt top.
- Remove the basting threads or pins.
- Trim away the excess batting and backing fabric that extends beyond the edges of the quilt top.
- Bind the quilt with the ready-made green binding using matching all-purpose thread.
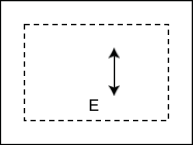
Full-size Patterns
Tip: for rotary cutting, measure pattern pieces and cut to size using your rotary cutter, ruler and mat. Refer to the last page for proper printing directions!


Full-Size Printing Test Page
Full-size pattern printing is not complicated at all. Meanwhile, I recommend printing these tips to keep them beside you.
Printers often change the scale as they are set to adjust output so that it would remain within the printed area. This feature is typically called Page Scaling. For full-size printing, it must be disabled by un-clicking or un-selecting.
Please note that while these instructions work for most printers, there is a possibility that your printer may be different.
- Do not use any form of Page Scaling – this option should be set to “NONE”
- If your printer has an Advanced Features this setting should be set to “Print Actual Size”
- Do NOT use the “Choose Paper Source by PDF Page Size” Box
- The Auto Rotate to Center should NOT be checked. Uncheck this box if it is the default
- Do NOT use the “Fit to Printable Area” option, as this option usually decreases the pattern size
- Do NOT use the “Shrink to Printable Area” option for the same reason
Also note that sometimes the scaling happens within the software, rather than at the printer. For example, when using the Windows Photo Viewer you select an image to print, it defaults to “Print Picture to Frame” – this option must be manually unchecked to print properly. When printing a PDF using Adobe Acrobat Reader, the default under Size Options is set to “Fit” – this option once again must be manually unchecked.
If you are using other types of software to print, check the settings carefully before printing. You can use this PDF Test Page to double-check before printing any patterns.
After reviewing your settings, print this page. The square given below should measure exactly 2×2 inches. If it doesn’t, re-check your settings and try again.
Each printer is different and settings vary widely across different brands. If you have problems with the printer scaling patterns after reading this material, please refer to your owners’ manual, as we do not offer tech support. A quick web search for your printer model will also yield information on your equipment.