Knotted stitches used for traditional embroidery can be worked as single stitches, along a line, or in groups to fill an object. The how-tos below show several variations of knotted stitches that you can use in your embroidery projects.
While many are familiar with French knots, the Colonial Knot is also a popular stitch and is used to work candlewick projects. It’s sturdier than a French knot but does require a bit more effort when working the stitch due to the way the stitch is formed. By looping the thread around the needle, the knot stands less of a chance of being pulled through the surface of the fabric to the wrong side of the work, or from being misshapen after laundering several times.
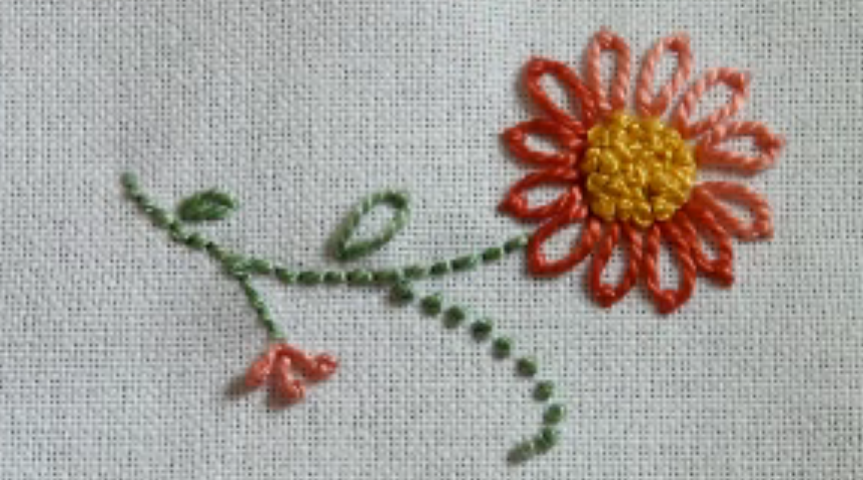
A French knot with a tail is a terrific stitch to use when working flowers with stamens, or when an unusual, textured stitch is wanted in an area of your design. Other stitches work knots directly into a line of stitching, as in the Coral stitch.
Many people seem to be afraid of French knots. I’m not sure why since they’re so easy to work. Just watch your tension – you don’t want it too loose or too tight, and practice a few stitches before working a French knot on your fabric.
French Knot Stitch
To work a well-formed French knot, bring your needle up through the fabric at the knot’s location.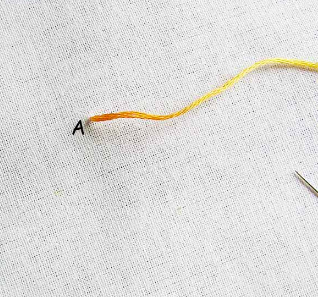
Wrap the thread around the needle twice.
The thread shall have the needle without being too tight.
Next, insert your needle near the original entry point.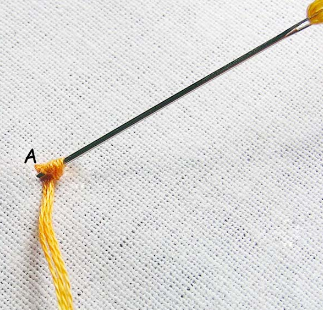
Holding the tail of the thread, pull the thread through the knot releasing the tail as it approaches the knot.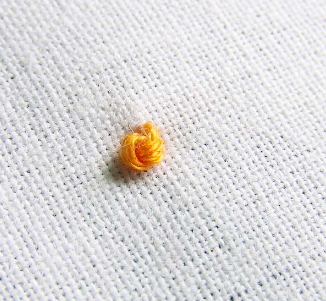
You can also wrap the thread once to make a smaller knot.
French knots can be worked singly, in clusters as a filling or along the curved or straight line. You can also make French knots with tails that are perfect for flower statements.
To make a knot with a tail (also known as a pistil stitch, an Italian stitch or a tack knot stitch), bring the needle up through the fabric twice and insert the needle in a distance from the originating hole.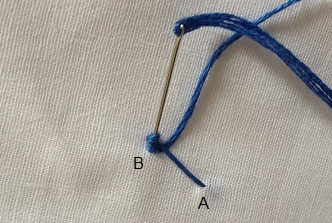
French knot is a simple, versatile stitch. Remember, practice makes perfect.
How to Make a Colonial Knot?
While French knot is known as the most popular stitch, the Colonial knot is its twin which some stitchers may prefer as somewhat easier to do. For the first time, too many people may find it too difficult to understand, though. Those who do understand and practice the stitch are going to enjoy the Colonial knot as it goes really quickly and easily. It also looks a bit different than the French knot, more sturdy and upright. But it takes a really sharp eye to see how the stitches differ. Twins will be twins.
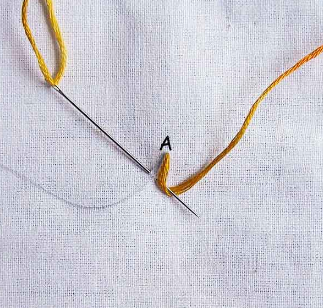
A Colonial knot, just like most of the stitches around, starts with working the thread through the fabric to its right side. Once that is done, slightly loop the thread and work your needle under it as shown below.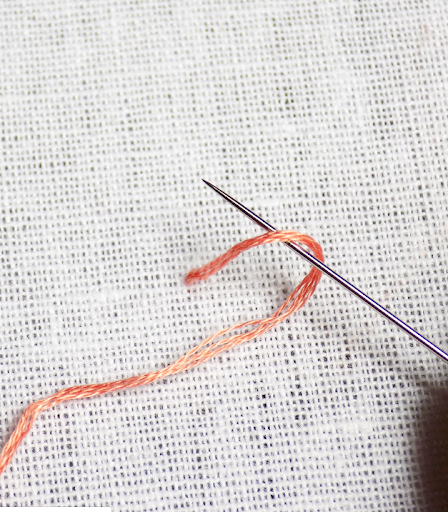
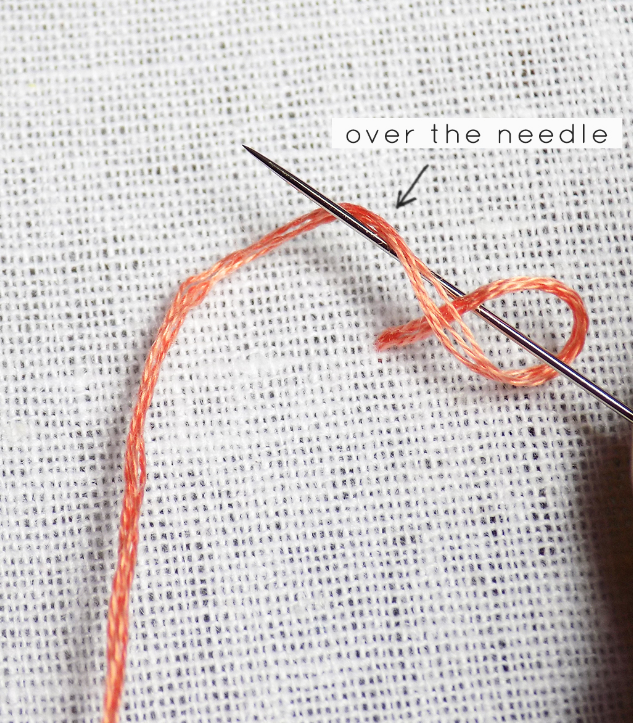
Now, grab the tail and carry it OVER your needle. A common mistake takes place as a stitcher sends the needle first under and only then above the needle. So, please ensure you first keep the needle under the thread wrapping the thread around the needle from top to bottom, not from bottom to top.
Pull the thread tail gently but firmly. This is another bottleneck. You would want to make it neither too tight nor too loose. Too tight would make it difficult or impossible for your needle to go through the knot, too loose would make the knots unstable and too bulky.
Send the needle back to the wrong side through the hole to be made as close as possible to the entry point.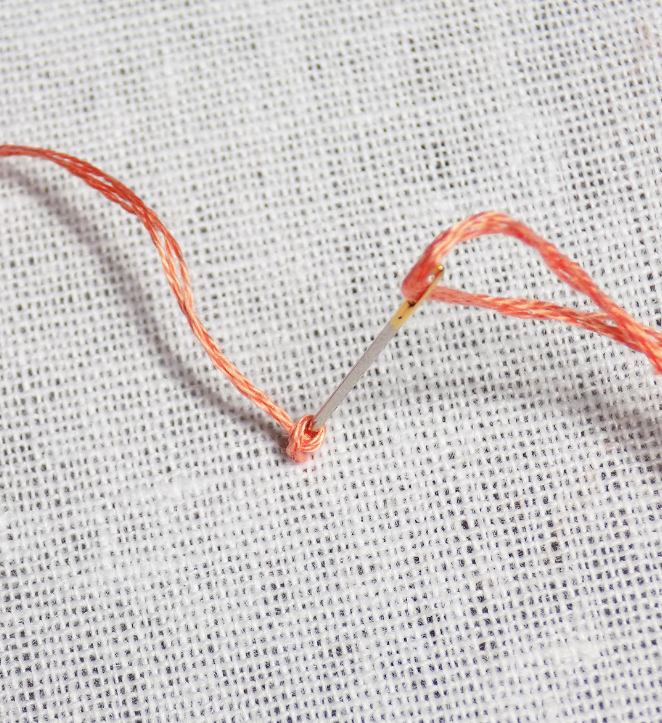
Grab the needle at the wrong side and pull it until you all the remaining thread at the wrong side. Enjoy the look of your Colonial knot.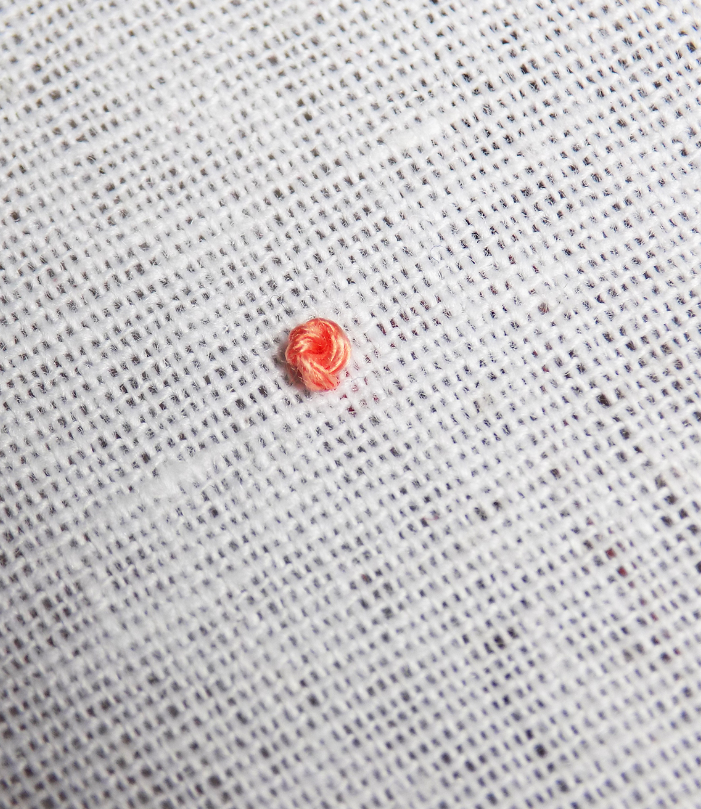
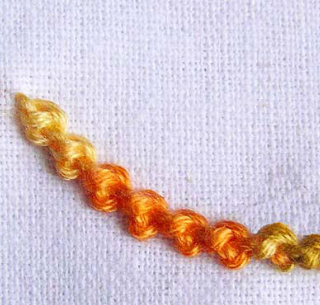
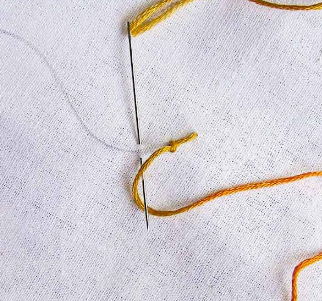
Coral Stitch Instructions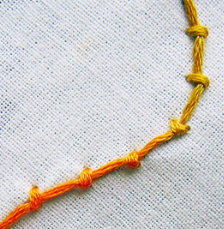
Coral stitch runs to the left on the right side from the needle entry point. The knots are to be worked along the line of the straight stitch. Uses of the stitch cover a range of embroidery types especially stem patterns. The example project below follows a curved line to show how flexible the stitch is.
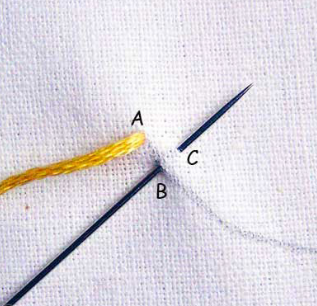
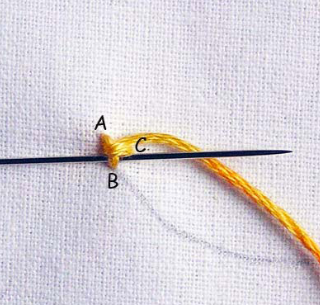
- Step one. Work the thread from the wrong side to the right side at point A. Send your needle to point B and pull it out at point C. The points B and C lie on either side of the stitch trail.
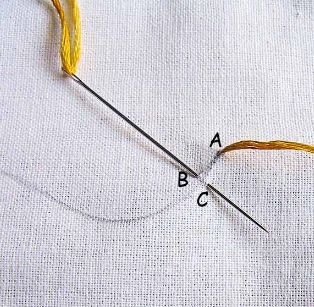
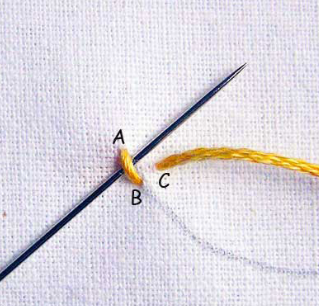
- Step two. Once that is done, slightly loop the thread and work your needle under it as shown below.
- Step three. Move the needle forward through points B and C and through the loop until the knot is completed.
Keep up making the knots as you work the thread over the trail.
Once finished, your coral stitch my look like below.
How to Do a Double Knot Stitch?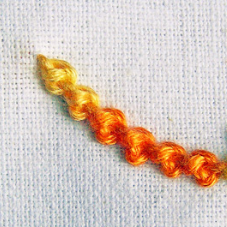
Also known as Palestrina, this stitch originates from Italy. It works best to mark the boundaries of your design vividly and boldly outlining it.
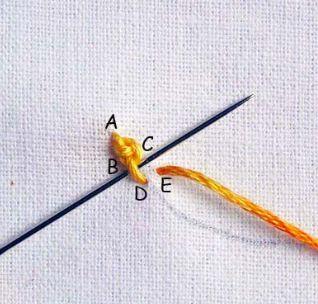
- Step one. Send the needle from the wrong side to the right side at point A. The points A and B lie on the stitch trail. Now, work the thread through point B and to the C as shown below. Eventually, the thread comes out at point C beyond the thread line and immediately opposite to point B, not too far from it.
- Step two. We’ve got an AB stitch as shown below. Send your needle under that stitch. Avoid plucking the fabric with the needle as it goes through.
- Step three. Send the needle under the AB stitch again after turning it around point A and above point C. Now, wrap the thread around point B keeping it below point C and send your needle through the AB stitch again.
- Step four. Pull the thread with your needle until the knot completes. The first knot is ready. Proceed to the next one sending the needle to the wrong side through point D lying on the stitch line. The DB stitch is to be of the same length as the AB.
- Final step. Work the thread on the wrong side to the point E just opposite to the points D and C and send the needle to the right side. Complete this knot just like the first one and continue stitching in the same manner as many knots as may be necessary for your design.