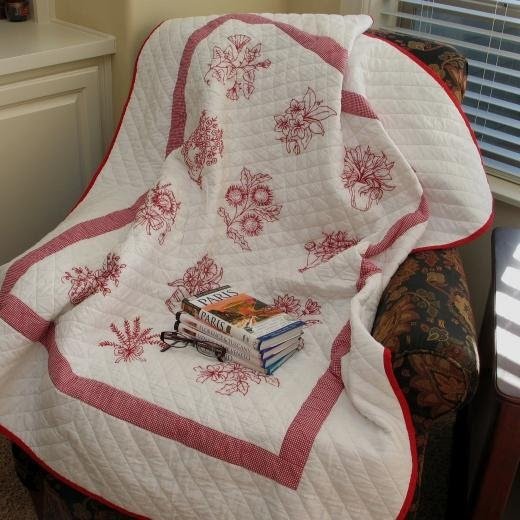
Redwork refers to harnessing simple embroidery techniques using red thread to stitch. BOM stands for block-of-the-month. This project is going to combine these frameworks to produce something gorgeous, neat and fairly practical.
What about getting a quilt made of 12 pieces of embroidered fabric? This would take time as you explore the craft of redworking and quilting! Stitch your Redwork BOM Quilt in a year at a comfortable pace following the respective BOMs available below! It’s normally worked on white or natural-colored fabrics and is usually finished as a quilt.
Color-fast red dyes invented back in the nineteenth century facilitates the application of red thread stitching. Red thread can still produce some bleeding or crocking, even today. However, the excess dye will normally wash out after a few extra washings – but do not dry the piece in between the washings or the excess dye could set on the fabric.
This pattern features a different bouquet of flowers for each month. It is a January to December BOM, but of course, you can start anytime and shift the months as you may wish. Such designs are normally distributed on a paid basis, so enjoy this Redwork BOM Quilt here as a freebie!
Redwork Embroidery Supplies:
- 3 yards white 100% cotton broadcloth, washed and pressed
- Size 9 hand embroidery needles.
- One 52 x 56 inch piece EACH of batting and backing fabric.
- 6 yards red double-fold binding.
- White all-purpose thread for assembly and red for binding.
- 1/2 yard checkered or gingham fabric for inner border.
- 18 to 20 skeins of red six-strand embroidery floss (I used *DMC 6-Strand Embroidery Cotton Floss, Color 498.)
Redwork Quilt Blocks
Finished size of blocks: 8 x 8 inches
Finished size of quilt: 48 x 52 inches
Quilt Patterns
Follow the free patterns below. Start with a yardage cutting guide and proceed to the flower patterns to be stitched on a month-by-month basis.
You will need to print them all full size – this is important to note if you want the designs to properly fit the blocks. Most printers will scale images when printing, and you’ll want to make sure this feature is turned off before printing.
For tips on successfully printing patterns full-size, refer to the Printing Tutorial we have prepared for you.
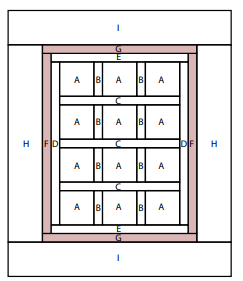
BOM Quilt Blocks: Yardage and Cutting Information
Cutting Instructions:
Cut the following from the white fabric. To ensure you have enough yardage for all items, cut the H and I strips first, followed by B through E. You will still have plenty of fabric remaining to cut the remaining 12 A blocks.
- (A) 12 squares measuring 9×9 inches (they will be trimmed down to 8.-1/2 x 8-1/2 later)
- (B) 8 strips measuring 2-1/2 x 8-1/2 inches for vertical sashing strips
- (C) 3 strips measuring 2-1/2 x 28-1/2 inches for horizontal sashing strips
- (D) 2 strips measuring 2-1/2 x 38-1/2 inches for white vertical inside border
- (E) 2 strips measuring 2-1/2 x 32-1/2 inches for white horizontal inside border
- (H) 2 strips measuring 8-1/2 x 46-1/2 inches for white vertical outer border
- (I) 2 strips measuring 8-1/2 x 52-1/2 inches for the horizontal outer border
Cut the following from the checkered fabric:
- (F) 2 strips measuring 2-1/2” x 42-1/2 inches for vertical middle border
- (G) 2 strips measuring 2-1/2” x 36-1/2” for horizontal middle border
Getting Started
Set aside pieces B though G until all of the 12 blocks have been completed.
Fold each of the A blocks in half vertically and horizontally and press to mark the centers. Trace the embroidery design for the first block using a water-soluble marking pen. Work the designs on the block using 2 strands of floss. Repeat for all 12 blocks available below.
Free Redwork Quilt Patterns
January
Redwork Block-of-the-Mouth
Use 2 strands of floss for embroidery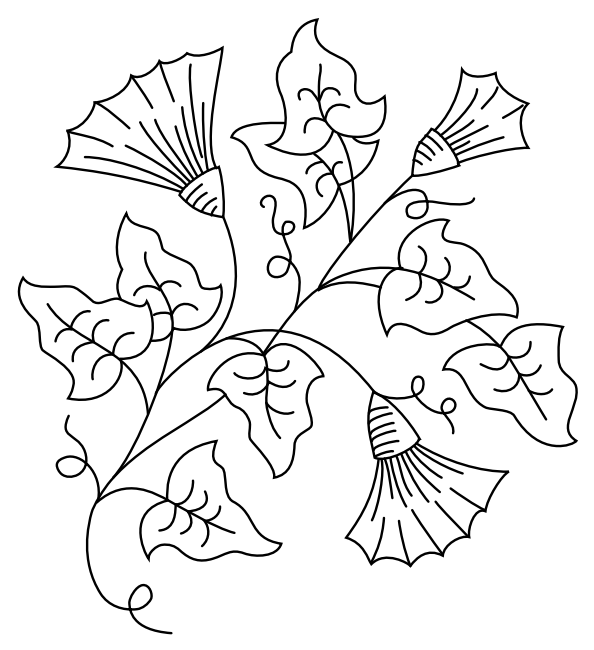
February
Redwork Block-of-the-Mouth
Use 2 strands of floss for embroidery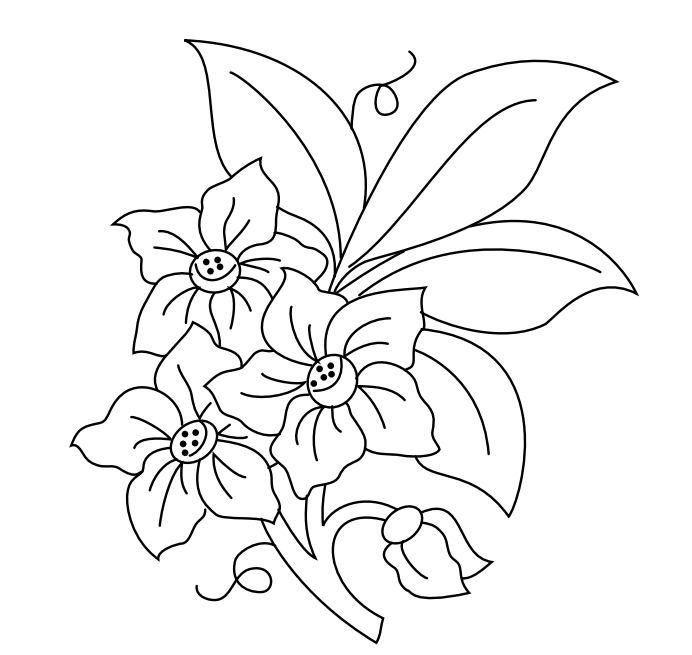
March
Redwork Block-of-the-Mouth
Use 2 strands of floss for embroidery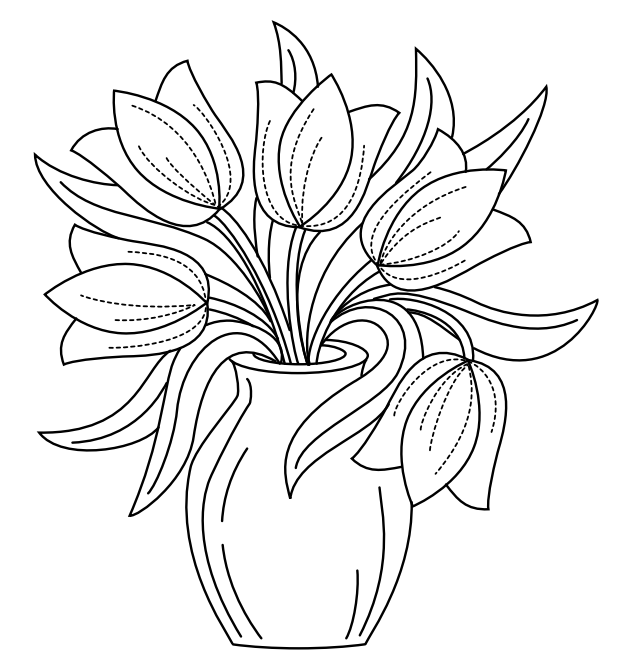
April
Redwork Block-of-the-Mouth
Use 2 strands of floss for embroidery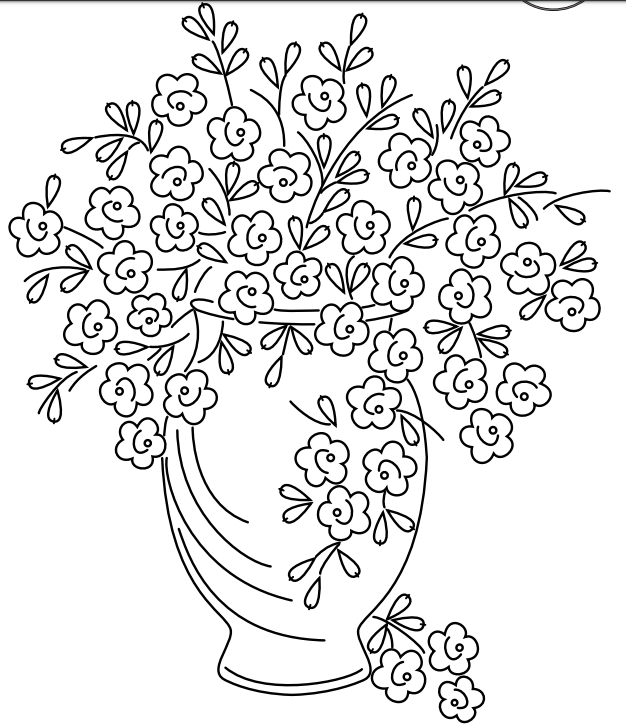
May
Redwork Block-of-the-Mouth
Use 2 strands of floss for embroidery
June
Redwork Block-of-the-Mouth
Use 2 strands of floss for embroidery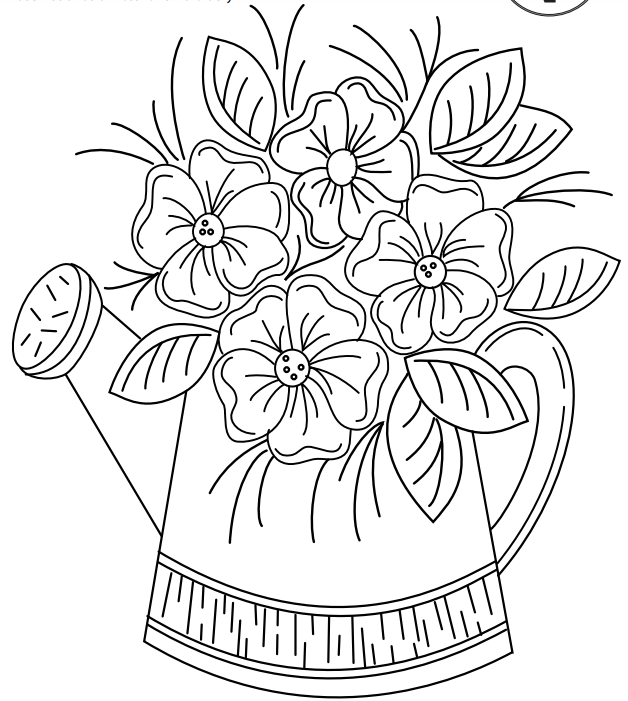
July
Redwork Block-of-the-Mouth
Use 2 strands of floss for embroidery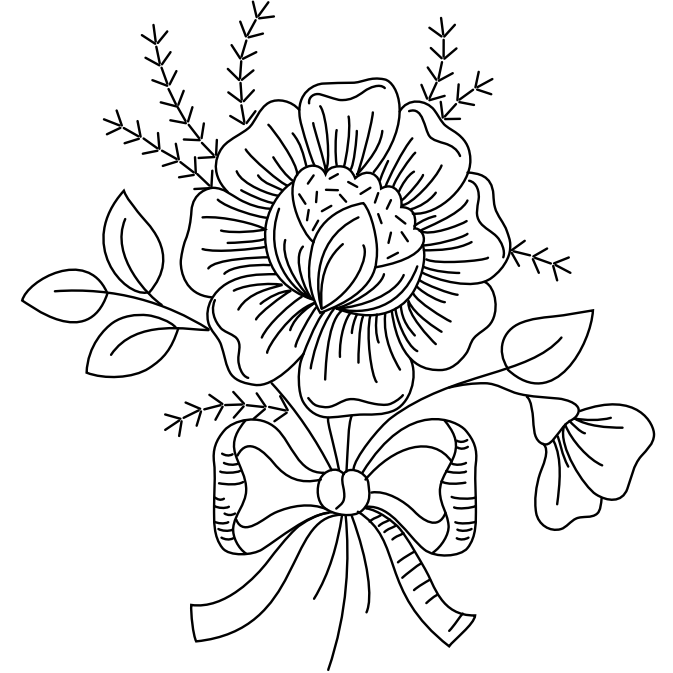
August
Redwork Block-of-the-Mouth
Use 2 strands of floss for embroidery
September
Redwork Block-of-the-Mouth
Use 2 strands of floss for embroidery
October
Redwork Block-of-the-Mouth
Use 2 strands of floss for embroidery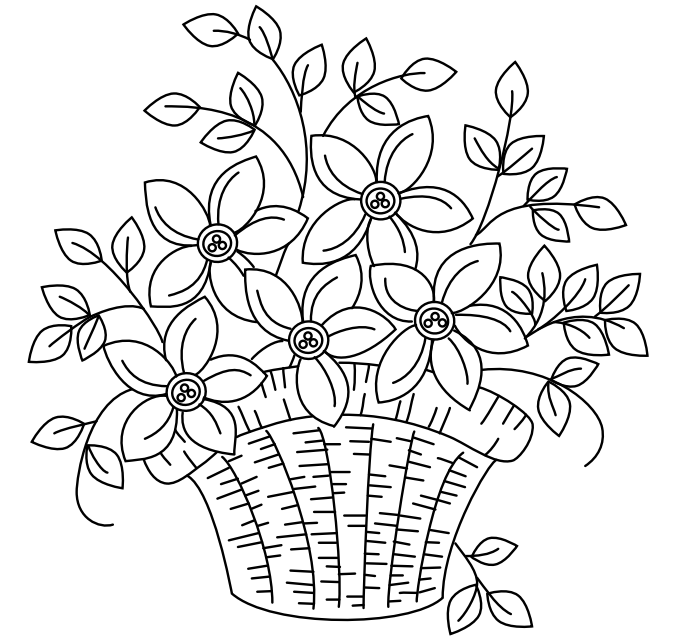
November
Redwork Block-of-the-Mouth
Use 2 strands of floss for embroidery
December
Redwork Block-of-the-Mouth
Use 2 strands of floss for embroidery
How to Sew Quilt together?
Once the embroidery has been completed on all 12 blocks, assembly them with the pieces B though G to finish the quilt as shown below.