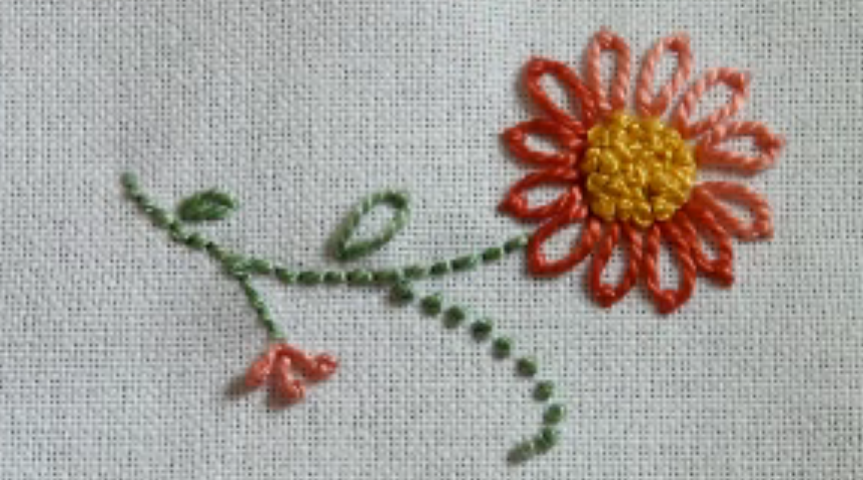
A big tree grows from a tiny seed. The incredible variety of embroidery stitches build upon a limited set of parent motifs. Meanwhile, these parent or basic stitches are actual working techniques. You would want to use them as such in many embroidery projects. Basic variations of a stitch outline borders and form bands, mark and fill shapes of your embroidery design.
These techniques do not include counted thread only stitches such as tent stitch. They basically pertain to freestyle or surface embroidery. However, counted thread techniques often use the parent stitches reviewed below as is or by deriving modifications adjusted to their embroidery styles.
Materials Needed for Embroidery
Great stock of accessories like hoops, needle threaders or magnifiers is available around to facilitate your needlework. We list essentials only, the things any project must have.
-
- A piece of fabric
Basic embroidery does not include needlepoint or any counted thread so that you do not have to work on canvas or Aida cloth or any open-mesh fabric. Furthermore, if you are about to stitch a curved pattern you may want your fabric to be a truly full weave. Full weave fabric would have no visible meshes that you can follow to work a counted thread. While such spacing is a prerequisite for needlepoint and most kinds of counted thread stitching, it is excessive in freestyle embroidery (also known as surface embroidery, traditional embroidery).
More importantly for this type of work, full weave ensures the fabric supports smooth curved and flowing lines and dense filling of embroidered thread inherent in many freestyle techniques. Fabrics based on twill and satin weaves typically offer great density that enables fine curved or flowing embroidery. Their actual density depends on how fine your stitching is going to be. A too heavy fabric would just kill a delicate project.
As regards the yarn the fabric is to be made of, I rather stick to all-natural sources working with weaves made of pure cotton, linen, wool, silk or, less often, their blends. Synthetic fabrics I have tried so far do not stand the competition with their natural counterparts.
-
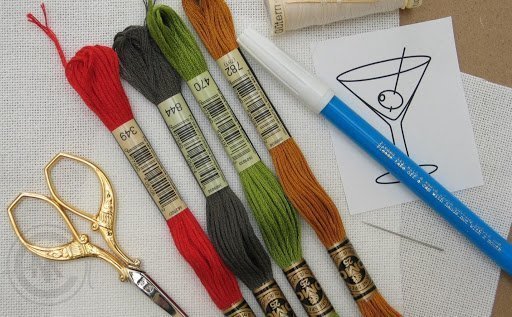
- Traditional embroidery thread
As traditional embroidery is not meant to follow open mesh fabric it cannot be too thick. You might consider using a sewing size thread for some parts of your project, but that is a really over-laborious and over-complicated way.
Freestyle or traditional embroidery has long since used Mouline thread. Major manufacturers offer embroidery threads for traditional style projects covering a range of sizes (typically, from Ne 30 to 3).
Ne stands for Number English. This number shows how many lengths of 840 yards a pound of yarn contains. That is to say, Ne 1 indicates the pound of yarn is 840 yards long, and Ne 10 means there are 8,400 yards in a pound of yarn. The bigger the count, the finer the thread.
-
- Embroidery needles
English and American needle sizes base upon needle diameter (in its thickest part). A typical set of traditional embroidery needles would include the sizes of 1 to 12. Smaller size, wider needle. Wider needles also get longer as the Chart below demonstrates.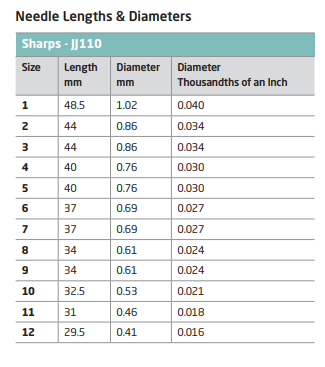 The most common sizes in the traditional embroidery are 7 and 9.
Embroidery needles also feature rather long-eye and sharp ballpoints.
-
- Scissors
Cutting and trimming are essential for embroidery. Cutting goes first as any embroidery can hardly complete without it while a pre-finished cloth would eliminate any need for trimming.
Both trimming and cutting scissors would fit you best if their finger rings are neither too loose nor too tight for you.
Cutting scissors should not be too long so that you would control what you cut precisely, nor you want them to be too coarse as you would want to reach as close as possible to the point you are going to cut.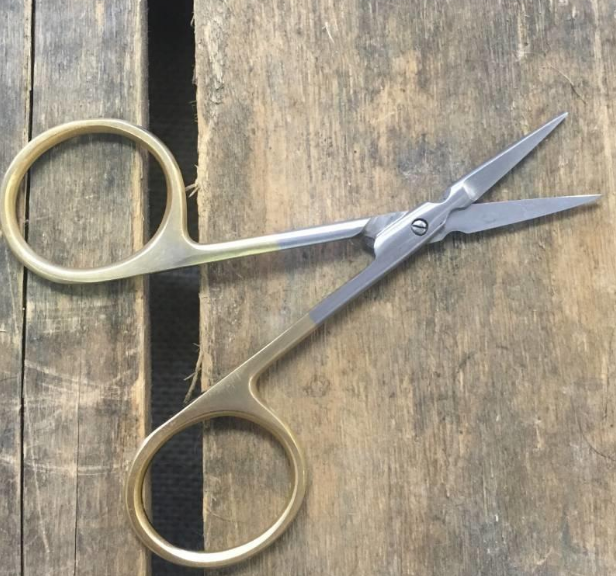 It is good to have in stock scissors of finer and coarser blades, as well as some curved scissors.
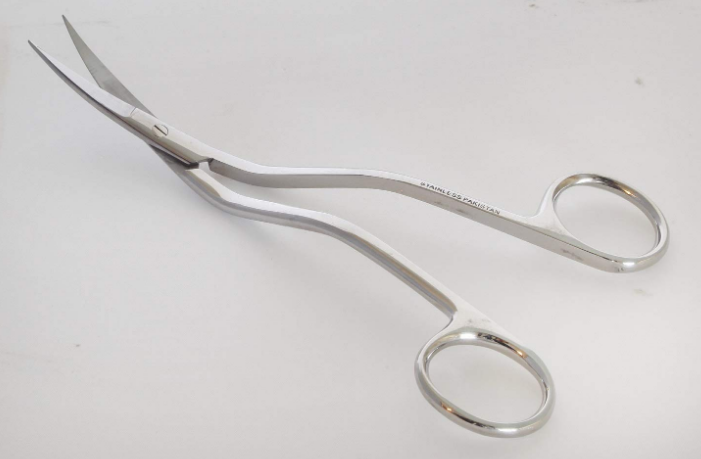 Curved scissors are good to work on the threads already surrounded by other threads as their design allows for teasing out and cutting such a thread without distorting the stitches around.
Fabric trimming requires longer blades that are not as sharp as for thread cutting in embroidery. Basically, trimming scissors get their blades longer or of nearly the same length as their handlers. Cutting scissors typically get their blades essentially shorter than their handlers.
Types of Embroidery Stitches
The stitch-specific guides below will walk you through the most common and basic freestyle embroidery techniques. Despite these do not include patterns worked in cross-stitch only any embroidery style builds upon those basic stitches or use them as is.
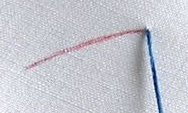
Running Stitch
Running stitch, also known as a straight stitch, introduces us to the world of embroidery.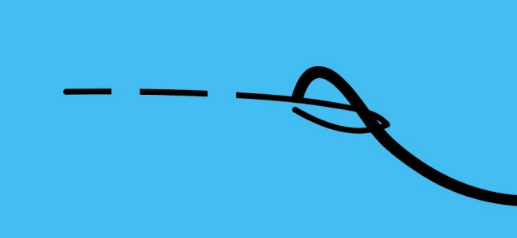
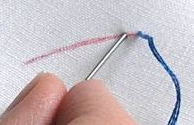
How to Do a Running Stitch?
Once you have threaded your needle, send it up through the fabric from its wrong side.
Grab the needle at the right side. That’s really simple.
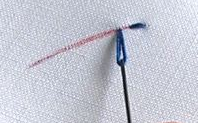
Now, just bring your needle back to the wrong side making another hole.
Move your needle under the face of your fabric so as to continue the straight line from the first entry point. Send it back to the right side and make another straight stitch on the surface. The stitch is to be of the same length as the first one. Send the needle back through the fabric again and make another stitch on the back of the same length as the first one you have made at the wrong side.
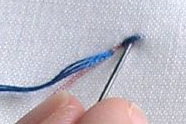
A nice-looking running stitch is to be worked at visually same intervals and in stitches of the same length. You may want to apply and follow a marking on the fabric for your first stitches (until you get skilled) or to observe certain preset dimensions. This will train your hand to work your straight stitch in even intervals.
Both hand sewing and embroidery apply this stitch. This emphasizes its versatile uses. A typical running stitch keeps more thread at the face than at the back so that the intervals between its individual stitches that you see would be smaller than those stitches.
This sewing and embroidery method provides a basic technique and a pattern for many more stitches and designs. Furthermore, it’s a kind of a super-basic embroidery. We have learned how to do a basic running or straight stitch. There are multiple variations, some of which we are going to review in a separate Tutorial.
Satin Stitch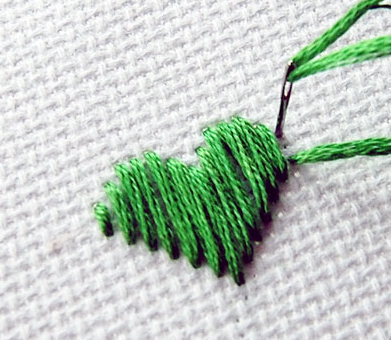
This is a pure filler. It is like a straight stitch running to and fro. Again, making this stitch is a super-basic embroidery, so that’s easy. What is rather challenging is to keep the stitches worked this way in a neat order or at least intact. To help finishing and maintain the stitch I would use one of the outlining stitches like a split stitch or a chain stitch. You will find tutorials showing how to make a split stitch, a chain stitch and other outlining and bordering stitchers further below.
How to Satin Stitch?
Step 1. Come up from the wrong side of your fabric to its right side and make the first stitch by sending your needle back down.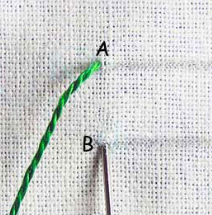
Step 2. Come up from the wrong side again, this time just beside the first entry point.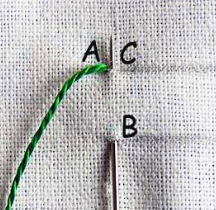
Step 3. Repeat these two steps until you fill the area you have worked on. It is good to outline the completed satin stitchwork with any outlining stitch.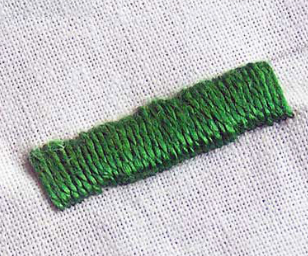
Darning Stitch Embroidery
Darning Stitches are sturdy stitches that were widely used for mending. Many of us remember our grandmothers and mothers mending socks, pants and household items using darning stitches worked in a variety of patterns. However, the decorative versions of these stitches are not just for mending!
You can use darning stitches to create gorgeous, textured bands and borders, and in many cases the backside of the work is identical to the front.
How to Do a Darning Stitch?
How to do a darning stitch? Darn it and stitch 🙂
All in all, it’s just a set of straight stitches running in parallel… Yes, they are parallel and straight, but it’s not a plain parallel running stitch. Threads running in any of its two adjacent lines are shifted to each other so as to face the intervals. All even lines would be identical; all odd lines would be identical.
A typical darning pattern has the same length of its individual stitches equal to the intervals they are spaced with.
To make a basic darning stitch:
- Stitch the first (even) row as a running stitch keeping the same length of the intervals between the stitches at the wrong and the right side. This produces a kind of a dashed stitch made of equal thread and space lengths (all stitches and intervals are of the same length.)
- Start the second (odd) row as a running stitch parallel to the first one, but shifted by one length.
- You have completed the basic sequence. Repeat it as long as your design may require.
Work this stitch horizontally or vertically to outline or fill shapes in your embroidery.
Seed Stitch
This is another stitch developed from the running or straight stitch. It is an easy, popular and versatile filler. Certain designs made with this stitch recall the darning stitch that we have learned above. Those are rather what they call a seed stitch.
How to Seed Stitch?
Essentially, there are two variations.
A seed stitch has its stitches spaced less evenly than a classic darning stitch.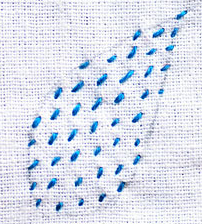
Meanwhile, its stitches tend to be arranged in parallel order. They often run in diagonal to the fabric or get otherwise skewed.
A rice stitch tends to be less strict. It does not keep its individual stitches parallel.
They often point to different directions as though seeds randomly scattered over the surface.
In fact, rice and seed stitch are interchangeably used terms. Stitchers my call randomly pointed scattered stitches a seed stitch and they also may call parallel rows of running stitches a rice stitch.
What is the difference between darning stitch and seed stitch?
The difference is quite obvious as long as the stitches are randomly pointed.
In the case of a classic seed stitch as shown above, the similarity between the patterns is striking. Essentially, a seed stitch would make its stitches (much) smaller than the intervals while a darned stitch makes all its stitches and intervals in a single length.
To make a seed stitch in a straight row, juts make parallel rows of running stitches. The most challenging in this activity would be to keep the lines actually straight while stitching within curved shapes. You might want to apply a provisional marking to ensure the lines actually go straight.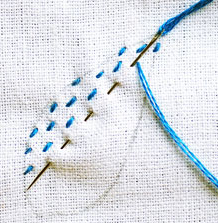
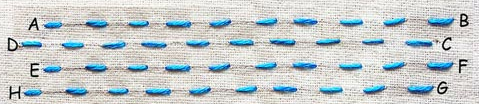
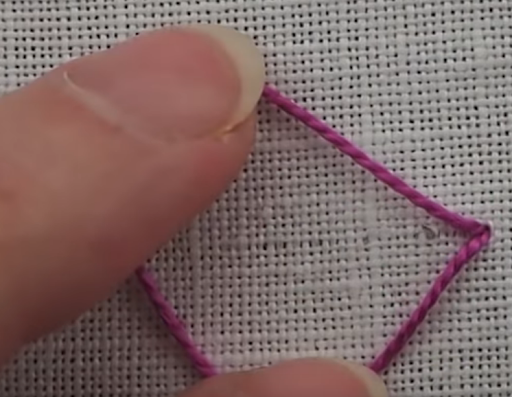
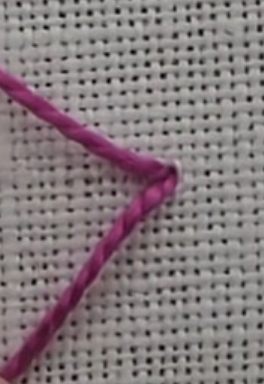
Back Stitch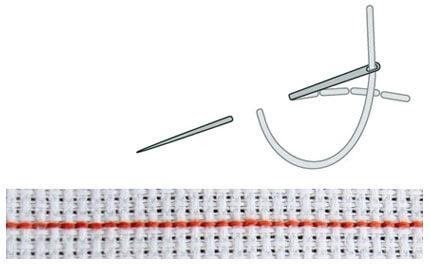
Unlike the running stitch and its variations and spin-offs, back stitch is a continuous line pattern. It would not have any intervals between the lengths of the thread applied on the fabric. This is a brilliant stitch to make a solid line or outline an area in your design.
How to Embroider Back Stitch?
How to backstitch? How to do a back stitch?
As I am doing this I imagine making a wheel with my needle running backward.
Send your needle from the wrong side of the fabric to its right side and send it back to the point your backstitch is actually to start. This is kind of the first quarter of your wheel as the needle goes down from above the entry point down to the exit point.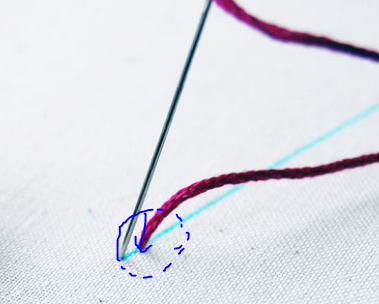
The second and third quarters of the wheel run on the wrong side. You are making two lengths under the fabric at once.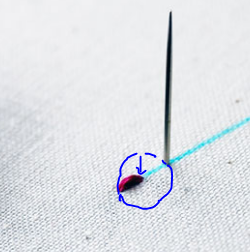
The surface stitch splits into two equal lengths as you keep rolling this needle-wheel over the face of the fabric. Complete the first full turn by sending your needle down to the first entry hole. Send it back to the right side through the second entry hole and start another wheel keeping the same size of the stitch.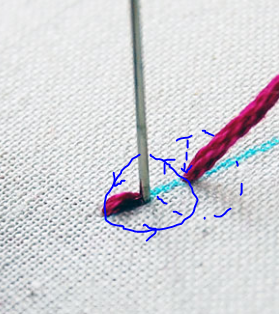
Important note! You would not want to complete the second wheel. Just skip the last quarter and send the needle after the third quarter to the second entry hole. The circle made with the pen over the picture above shows where you need to stop making the second circle. Send the needle down and make another ¾ wheel. Continue that way as long as your patter requires.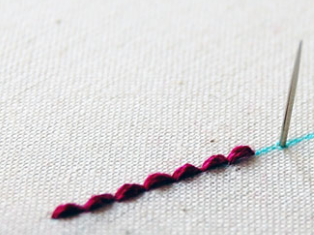
Again, this stitch is very simple to do.
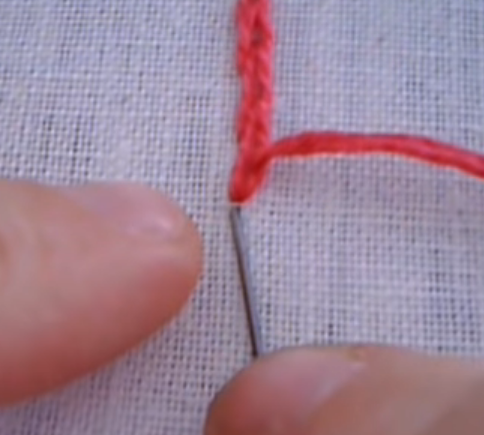
Chain Stitch
Making this stitch and its spin-offs is a big fun. Many beginners grow scarred to start or annoyed to make this stitch. It requires a bit of patience, but the outcome is fabulous! At least, I would give it a try.
Chain stitch is perhaps the most complicated among basic embroidery stitches. It is also known and tambour stitch and is a parent stitch for the versatile family of loop stitches to be made available in a stand-alone tutorial.
The stitch makes a bold straight or curved sewn line. It could be a stand-alone part of your pattern like a flower stem or outline its shapes. Individual units of this stitch work magic when scattered over your design or attached to other lines. It’s a quite laborious stitch so I would not use it as a filler. Others do. That’s just because it’s gorgeous.
How to Do a Chain Stitch?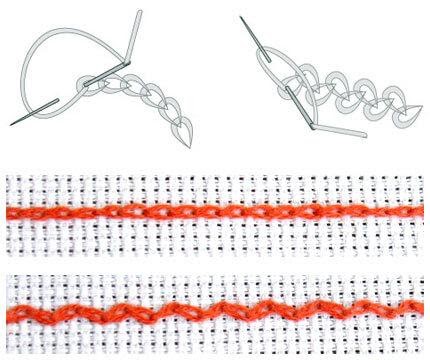
The chain usually runs from left to right or from bottom to top, but also could get curved and skewed.
So, how to chain stitch?
Step 1. Bring your needle from the wrong side to the right side at point A. Send it back to point A and then through point A to point B without removing the needle from the fabric so that its tip surfaces through point B.
Step 2.
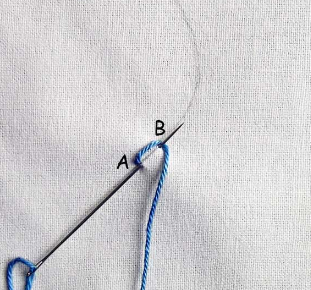
Step 3. Come up with your needle to the right side of your fabric. Send the needle back exactly through the same hole that it has come from.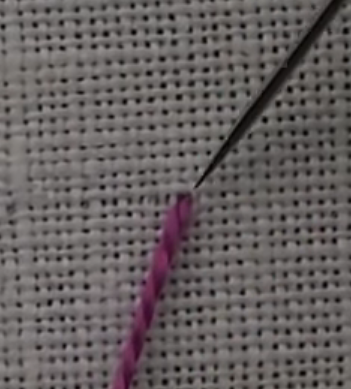
When pooling the thread under the wrong side keep a small loop at the right side holding it with your fingers.
Step 4. Send the needle back to the right side making a hole to the left from the first entry point. This shall be within the loop that you have left. Pull the thread further to complete the first loop.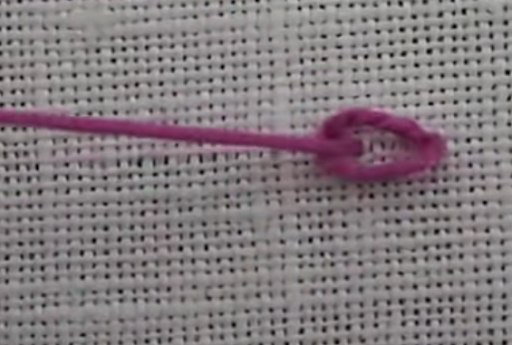
Step 5. Start making the next loop just like you have made the first one.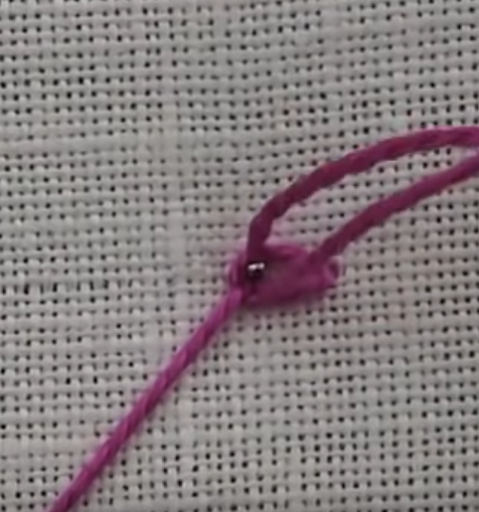
Send the needle back to the hole that it has come from. Keep a bit of tale at the right side while pulling the thread at the wrong side. Come up with your needle at the right side again, this time inside the second loop. Tighten it, and proceed to the third loop sending your needle back.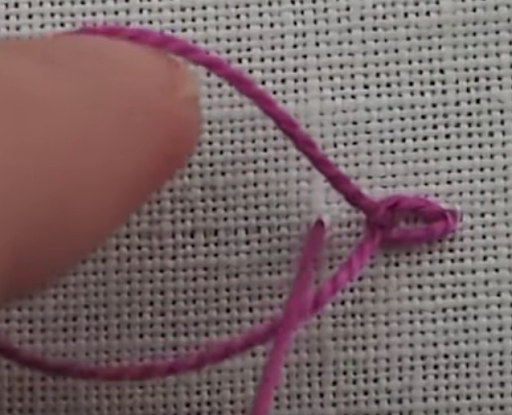
Continue as long as necessary.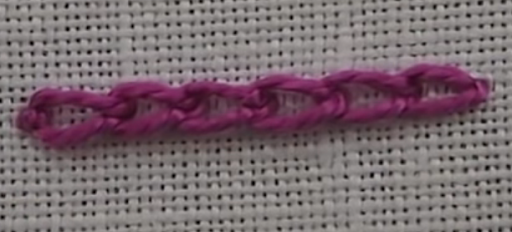
You can turn your stitch into different directions to make curved or broken lines.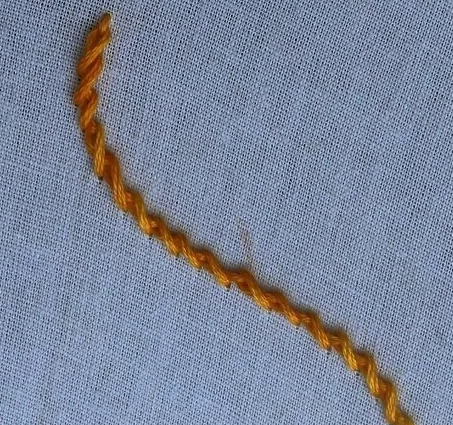
Split Stitch
This resembles a stem stitch by appearance. The technique is similar to the back stitch. Uses of the stitch are quite versatile. You would want to fill or align shapes of your design or make stems for flowers with the split stitch.
Also known as a Kensington stitch, stems stitch proliferated in the Middle Ages. In England, it was a luxury type of embroidery, often made with golden thread over silk fabric. These days, it is also a popular and basic stitch.
The split stitch is fairly easy to make.
How to Do a Split Stitch?
Step 1. Come up from the back of your fabric and come back down as if you were making a back stitch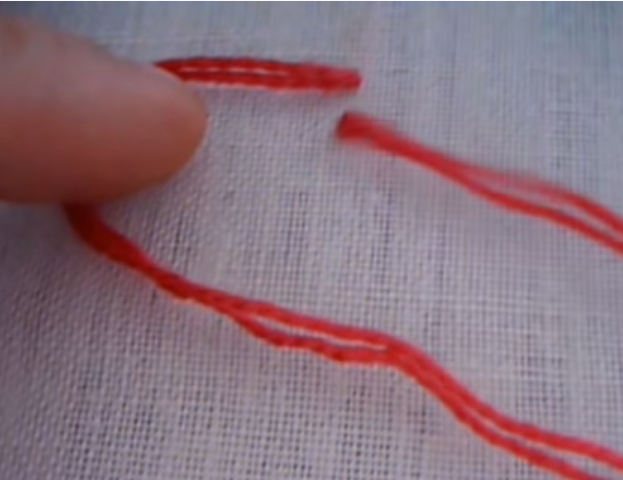
Step 2. Here’s where the split stitch differs from the back stitch. Instead of coming down here and working your way back you actually would then come up between the fibers in the middle of the first stitch. In this example, I am using two-stranded thread, but you can have more.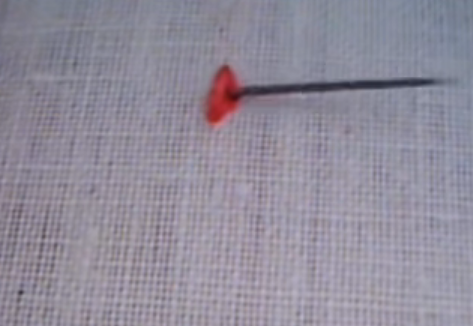
Step 3. Next, make a stitch over the end of the first stitch as shown below and come back down. The length of this stitch would need to be roughly the same as the first stitch.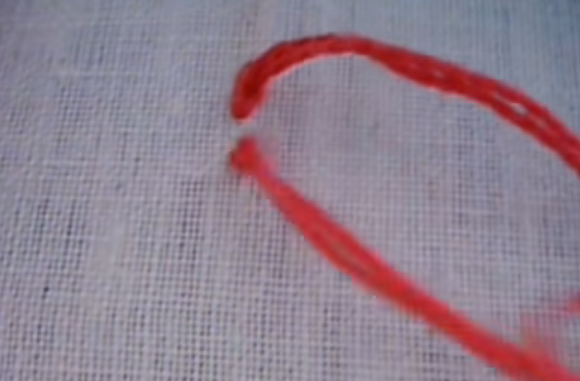
Step 4. Now, come up from the back again in the middle of your second stitch. Go back down over the second stitch just like you have done after the first stitch.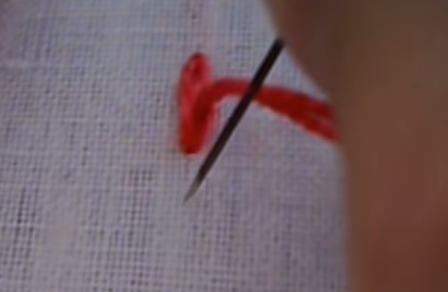
- Step 5. Continue the stitch as long as necessary. To end the stitch, go down a bit further and work the thread to the backside of your canvas.
Blanket Stitch
Historically, this stitch appears in blankets finishing their edges. Embroidery also employs it widely as an outline and border stitch. It is also a flexible stitch. You would like using it to make an object with curved borders like wheels or festoons.
How to Do a Blanket Stitch?
The stitches are made in straight or curved rows. This tutorial shows how to do a blanket stitch in a straight row.
Each blanket stitch actually consists of two sub-stitches. You first make a diagonal stitch from top to bottom, and then a vertical stitch from bottom to top while looping the thread around the needle. Let’s go through this in a step-by-step manner.
Step 1. Send the needle from the wrong side to the right side, and then from B to C through the wrong side as shown below.![]() Keep the thread under the needle as in the picture above.
Keep the thread under the needle as in the picture above.
Note the C is on the same line as A if you are going to make it a straight line. You can shift it, and actually many patterns require shifting to make various curved shapes like wheels.
Step 2. Make another blanket stitch in the same manner. Keep the upper and lower levels of the stitch evenly spaced if you are going to have a same-width line.![]()
A straight line of blanket stitches would keep all upper and lower levels at the same line as shown below.![]()
Buttonhole Stitch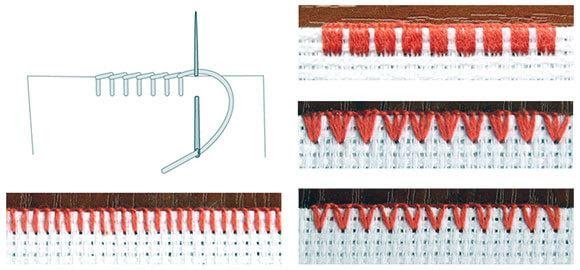
The buttonhole is a flexible and tight stitch. It has historically been used to work on fabric edges as a neat finishing embroidery. As its name suggests, it has something to do with a buttonhole. Exactly! Its traditional use is to reinforce buttonhole edges.
You would want to use it to outline objects in your embroidery while its flexibility works magic for making curved lines like in tendrils or acorns.
How to Do a Buttonhole Stitch by Hand?
Step 1. Send your needle to the right side of your fabric and bring it through B to C keeping part of the needle at the wrong side. Loop the thread under the needle as shown below.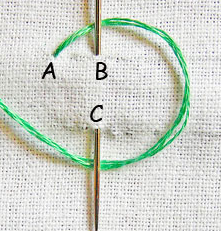 Pull the needle out of the B and C to make your first stitch. Important note! While pulling the needle out of C move it upwards to make a sturdy knot at B.
Step 2. Send the needle through D and E keeping it partly at the wrong side as shown below. This is essentially what you have done in Step 1 sending the needle from B to C. Again, loop the thread around and under the needle from top to bottom (or from the needle eye to the needle tip). Complete the second stitch just like you have completed the first one.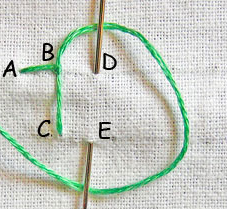 Keep on stitching as long as necessary to produce this sturdy outline stitch.
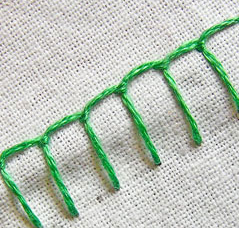
Herringbone Stitch
This stitch features a rather simple pattern of stitches that, just like the name suggest, reminds that of a fish. The similarity is very loose as the stitch has a totally distinct pattern that remains the fish ribs only very approximately. By the way, there are other names for this stitch, including as follows: Plaited Stitch, Catch Stitch, Witch Stitch.
This is a nice finishing stitch used in many embroidery projects, the Redwork Embroidery Pattern in particular.
Herringbone Stitch Steps
Step 1. Come up from the back with your needle at point A. Send it back at the point B shifted to the right on the parallel line. Along that parallel line, work the thread at the back to come out at the right side at point C.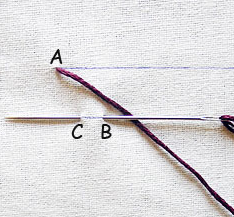
Step 2. Now, work the thread over the right side from C to D as shown below. Go back with your needle along the upper parallel from D to E working at the wrong side. Send the needle to the right side at E.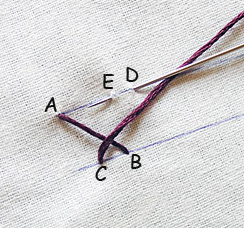
Step 3. Keep working this way within the two parallel lines to get a neat Herringbone stitch.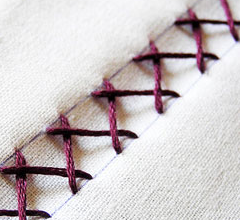
Chevron Stitch
Chevron Stitches are stitches using a combination of diagonal stitches capped with straight stitches. These stitches look terrific used in borders or as bands in a project.
Chevron stitches can be worked as counted stitches, or pre-marked on the fabric and worked as surface stitches.
This name is more popular as applied to a knitting stitch. However, it is also a neat embroidery stitch, and here is a guide showing how to make a chevron stitch in embroidery.
How to do Chevron Stitch in Embroidery?
Step 1. At point A, bring the needle up from the back. Send the needle to point B shifting longwise along the parallel line. On the wrong side, bring the needle from B to C. Come up to the right side at C and send the needle to D.![]()
Step 2. Bring the needle at the wrong side to B and come up sending it across the stitch line to E. Work the thread at the wrong side from E to F, and then turn it over E to G as shown below.
![]()
Continue this way until you complete the line.![]()
Stem Stitch
Stem Stitch or outline stitch is commonly used to make a thin outline around a shape. It can also be used as the stems and tendrils in a floral design and can be made thicker by working the stitch over, rather than along, the marked line.
Stem stitch can also be used as a very pretty filling stitch. This is done by working rows of stitching close together. You can work the filling in the same color, or shade the area using different colors. Keep the length of each stitch the same for consistency when working the filled area.
How to Stem Stitch?
- Work the thread from the wrong side of the fabric to its right side.
- Measure one stitch from the initial point and work the thread down from the right side to the wrong side.
- From the wrong side, work the thread up into the right side so that your needle would enter the right side just a stitch away from the first stitch you have made.
- Pull the thread back sending your needle to the wrong side again at the middle of the previous stitch.
The steps 3 and 4 repeat until you get your design completed.
Embroidery Knot Stitches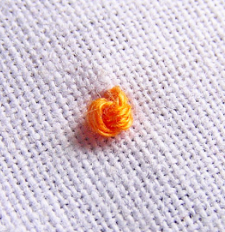
There are two basic knot stitches, French knot, and Colonial knot. The step-by-step instruction bellow shows and tells you how to make a French knot. Colonial knot and other knot stitch tutorials are available in the Knot Stitch Detailed Guidance.
If you are a newbie to this stitch, read these instructions first for better performance. This way you are going to focus on the embroidery rather than on reading when making the French stitch.
So, how to do a French knot?
How to Make a French Knot?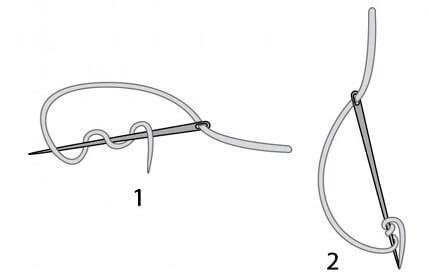
Step 1. Send the needle through the fabric to the right side. The hole you have made is almost the place to make the knot.
Step 2. Wrap the floss around the needle two times. That is going to be a classic French knot. You can make it finer wrapping the thread just once. Wrapping the thread more than two times is not a good idea as that would produce a bulky and uneven knot.
Loops of the thread around the needle are to be just tight enough. You would not want the thread to slip away or your needle to get stuck in its wrapping. Do not worry if it takes some time to go smoothly through this stage.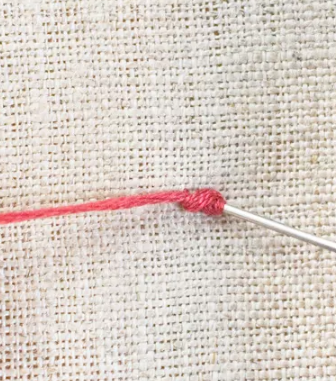
Step 3. Insert the needle as close as possible to the thread entry point. Some stitchers suggest sending it back exactly via the hole it has made on its entry. I would not do that, for such an exit is likely to push your knot to the wrong side.
Hold the tail as you work the needle through the hole so as to avoid any extra loops releasing it smoothly to the wrong side as the stitch gets completed.