Before I introduce my guest, I wanted to let all the previous guests know that I am now so techno-savvy that you can get a button from the Guests page – something fun to decorate your blog with! Now on with the good stuff…
Today I am super-excited to share a guest post with you from Mrs. Blue-Eyed-Yonder – Krista! She has such an adorable blog with lots of cute ideas and a fun, positive outlook on life. Today she is inspiring us to be bold and pick up the power tools! I admit, I am intimidated by them myself – but what she does is so inspiring I think I will give it a try. Let’s read together…
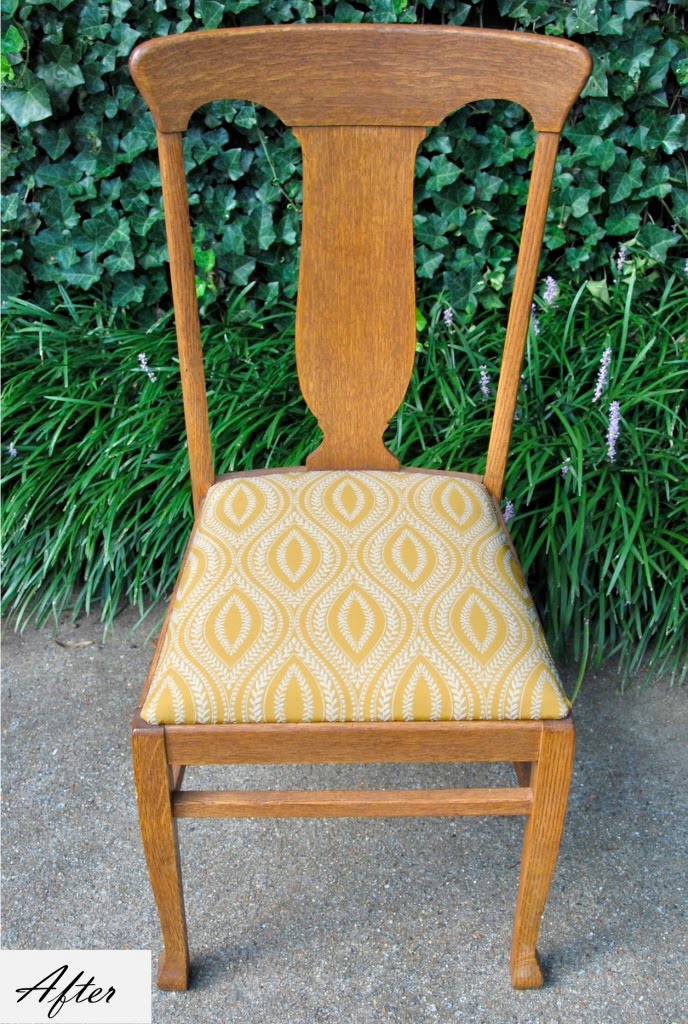
DIY Chair Bottom Makeover
A big thanks to Jessica for inviting me to guest post here at Sew Homegrown. Today I am excited to share with you a little DIY for giving those upholstered bottom chairs lying around your house a fun facelift.

These chairs actually belong to my Grandmother, they are on loan from her treasure trove of antiques. (If they were mine, I would have painted these puppies in a heartbeat. But alas, I didn’t want my sweet Mema to faint, so I just stuck to the seat bottoms.) She’s a smart lady and has always had an eye for quality. These little chairs are quite sturdy and well built, however their bottoms have seen better days. Hmph, I can relate.
So, I set out to revive these chairs. Here’s how I did it…
Materials:
- One chair bottom (in desperate need of a little TLC)
- Small sheet of ½” plywood
- 1” thick upholstery batting
- Thin quilters’ batting
- Upholstery fabric
Equipment:
- Speed Square
- Tape Measure
- Screwdriver
- Jigsaw
- Circular Saw
- Electric Sander or Sanding Block
- Pneumatic Nail Gun or Hammer and Nails
- Staple Gun
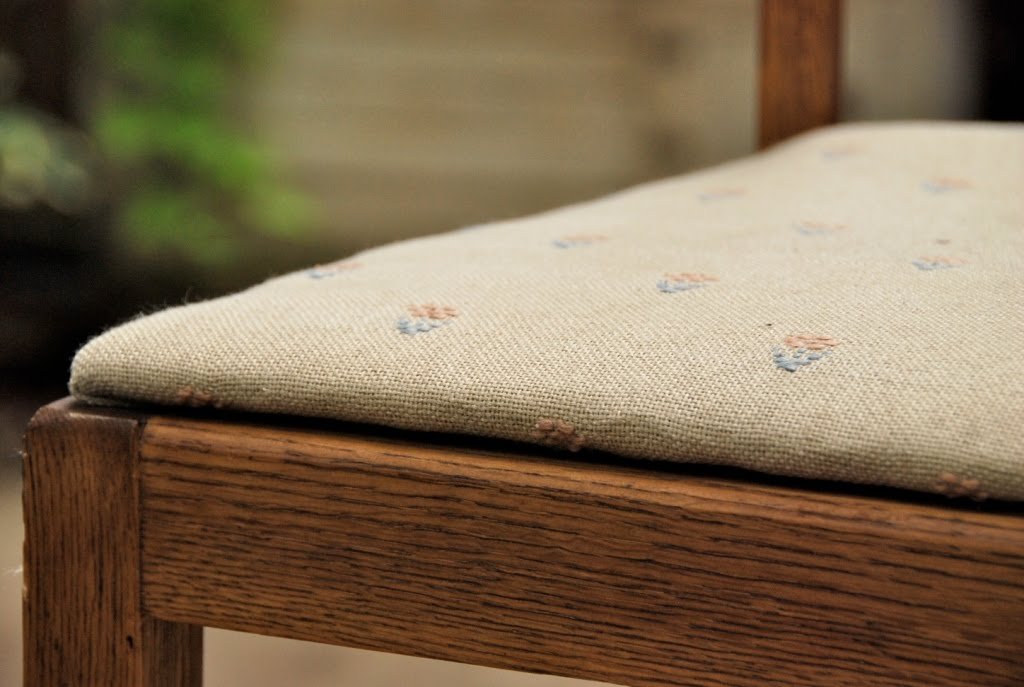
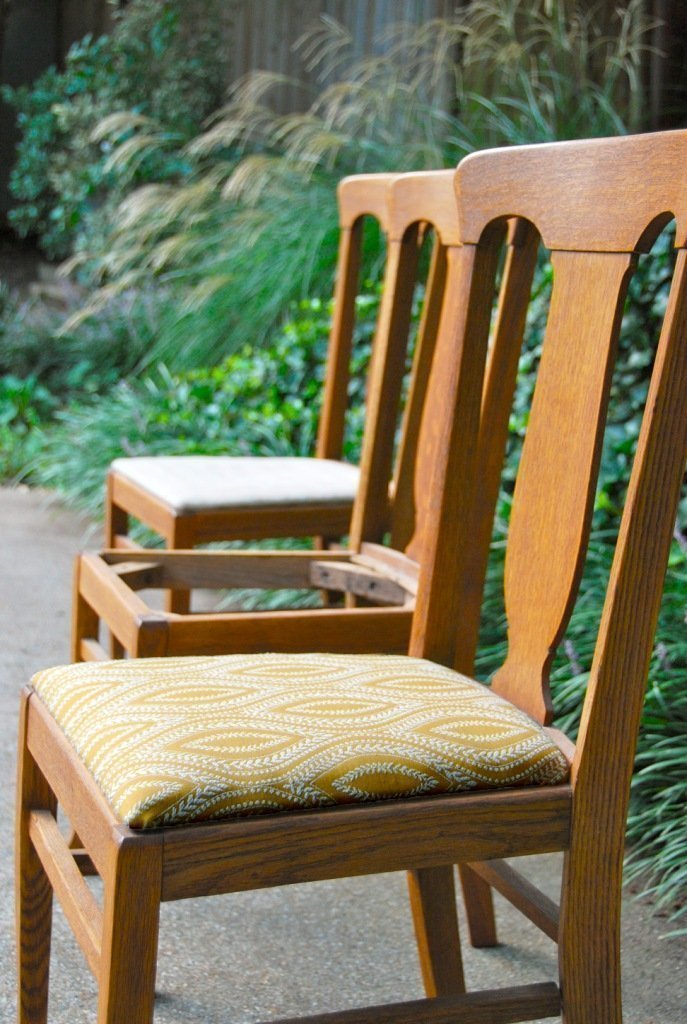
Here is the seat bottom, quite worn and a little outdated.
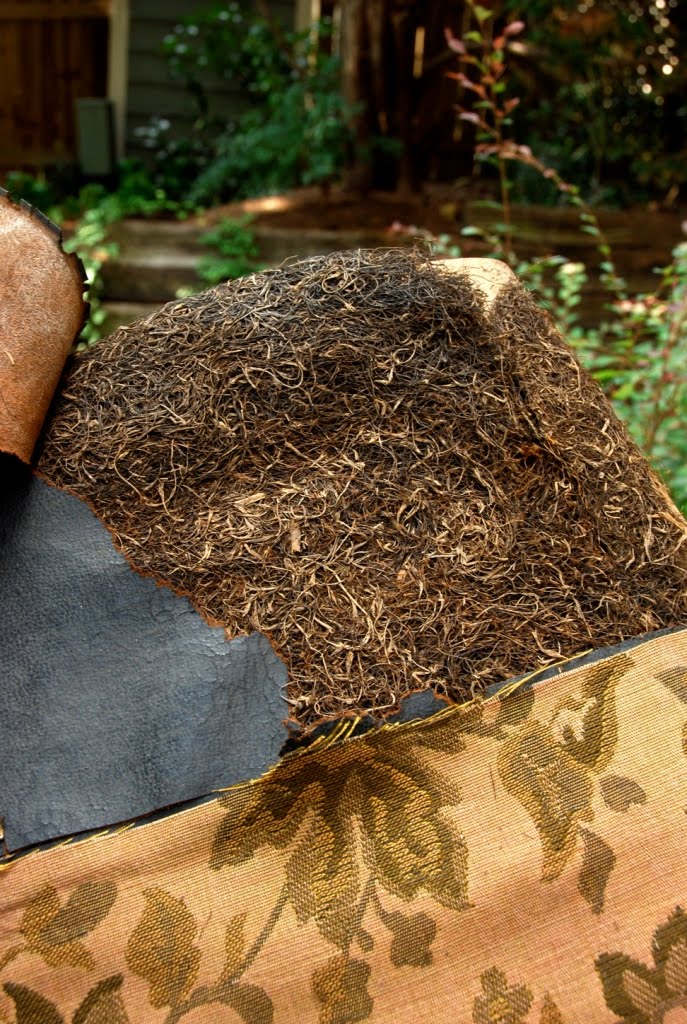
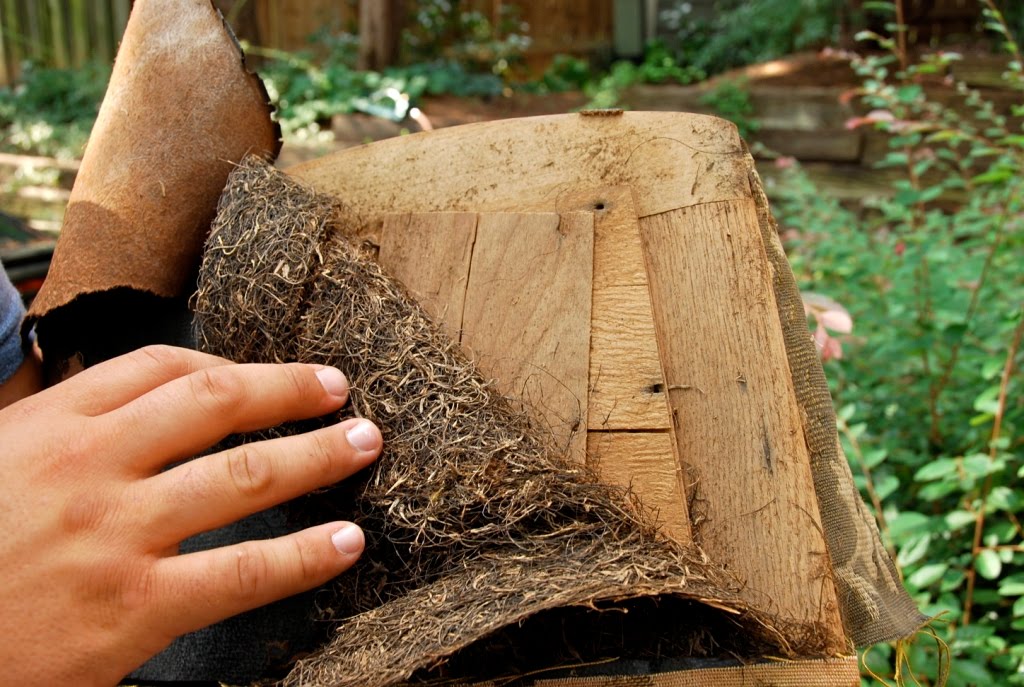
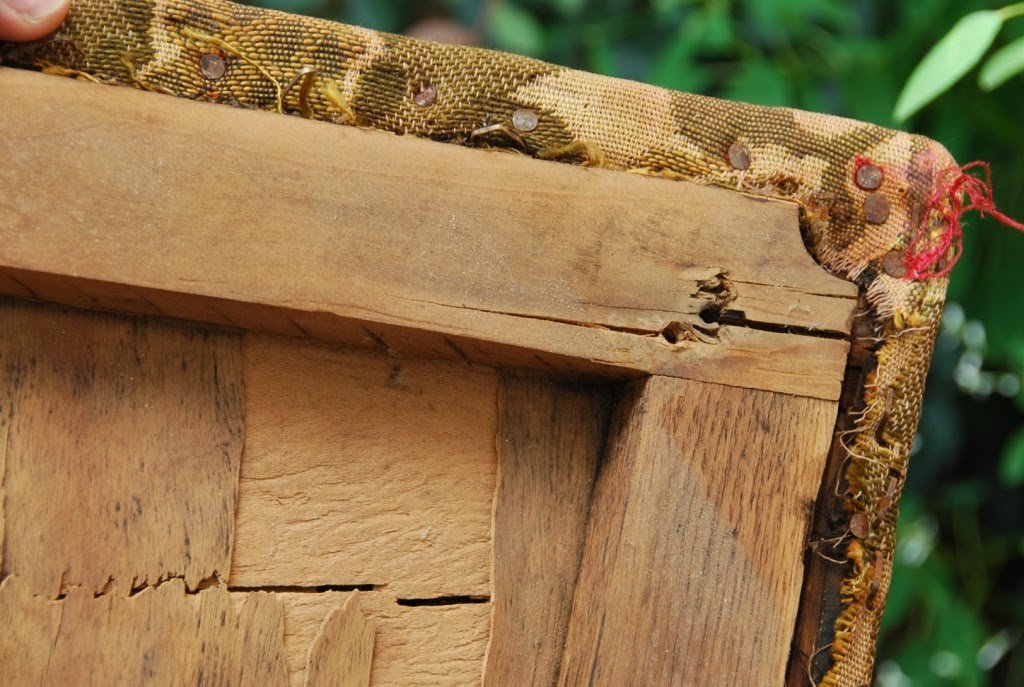
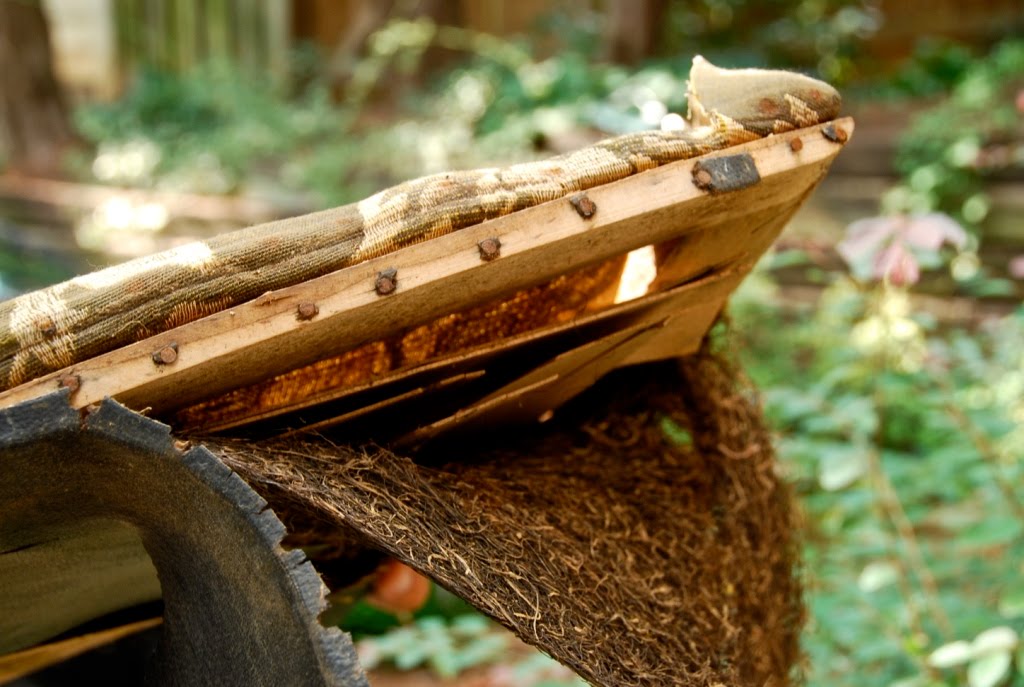
I wanted to get an up close and personal look at the construction of the bottom, so I began to deconstruct it. It had not one, not two, but three previous upholstery fabrics on it. Each layer was like stepping back in time.
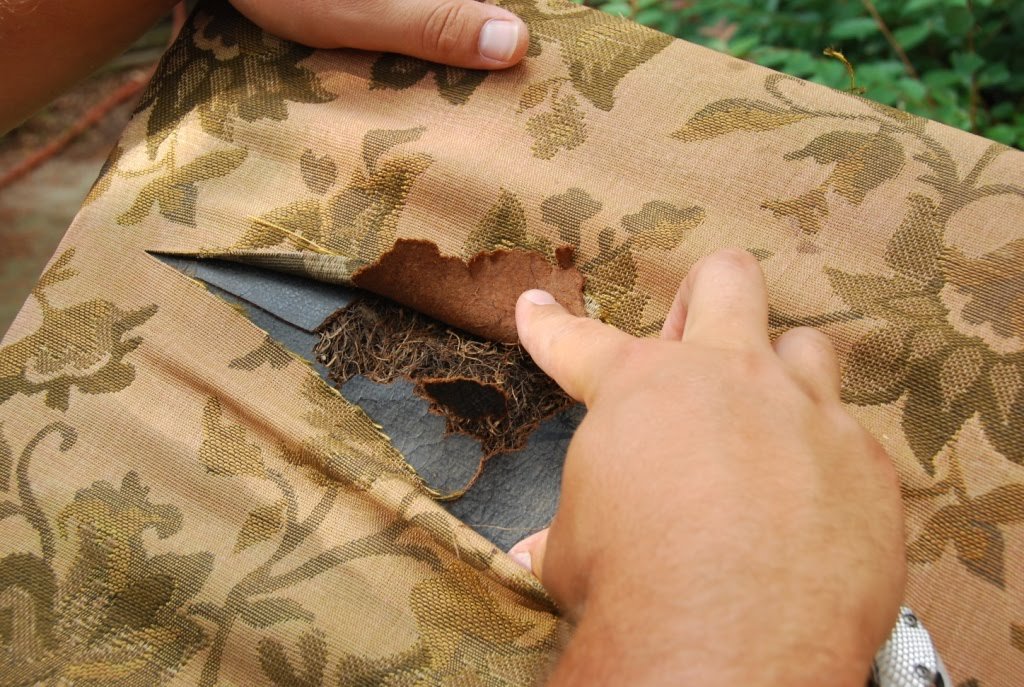
The original batting was made of a matted, moss-looking material.
The bottom was constructed of several thin, plank pieces of wood. No wonder it creaked.
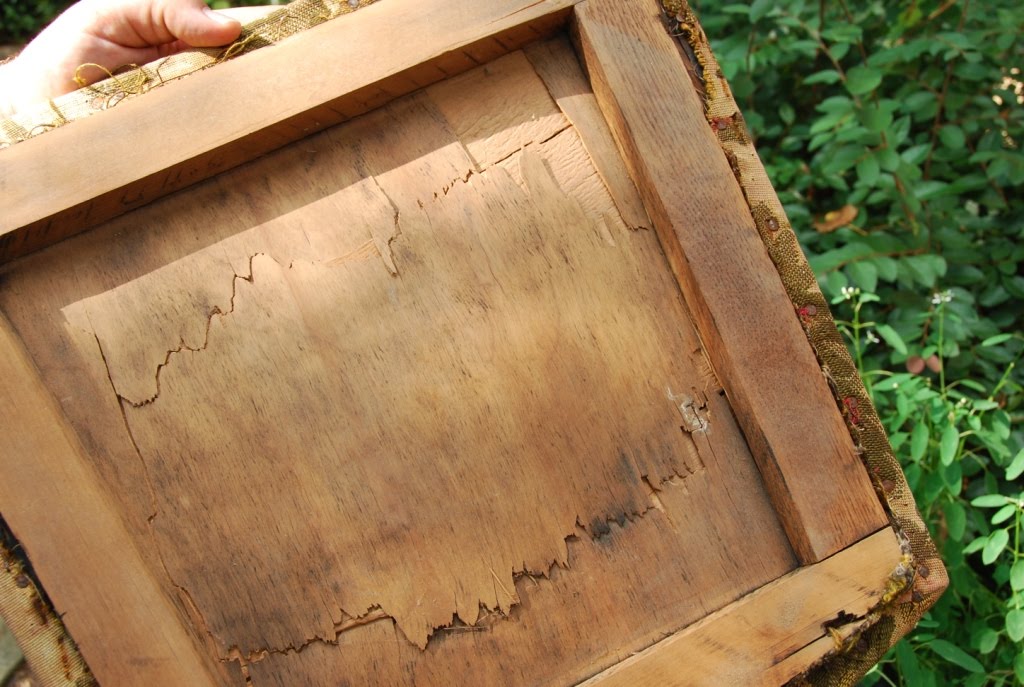
And as it turns out, it not only creaked…it apparently cracked. Glad I took on this project before a guest fell through my chair.
It was beginning to be clear that newly constructed chair bottoms would be in order. There was almost no way to make use of these anymore.
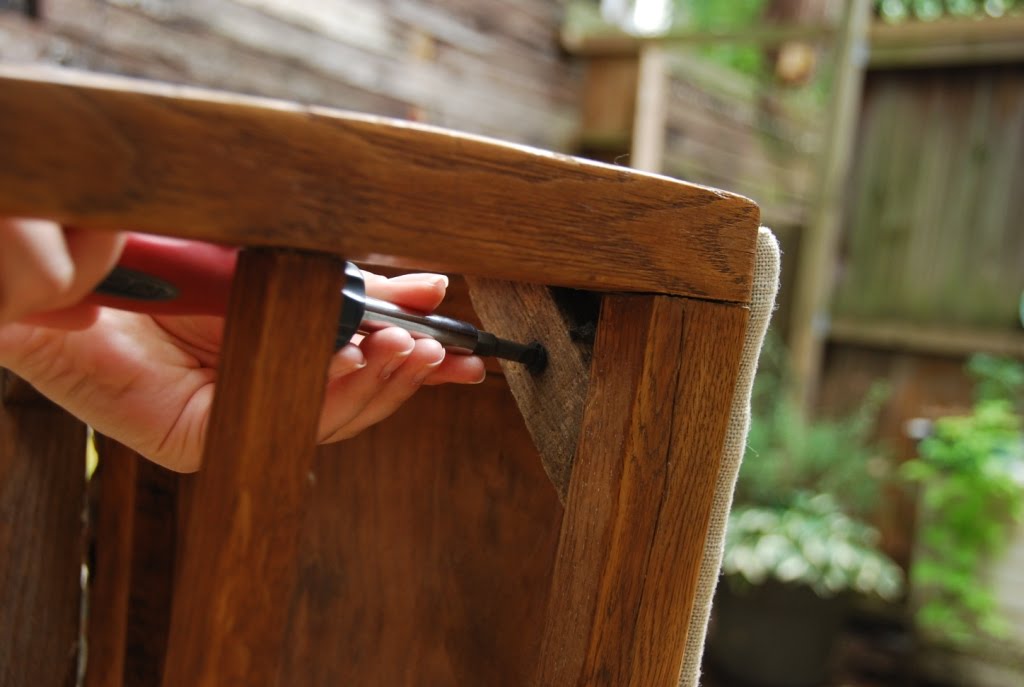
To begin, remove the existing chair bottoms by removing the placement screws underneath.
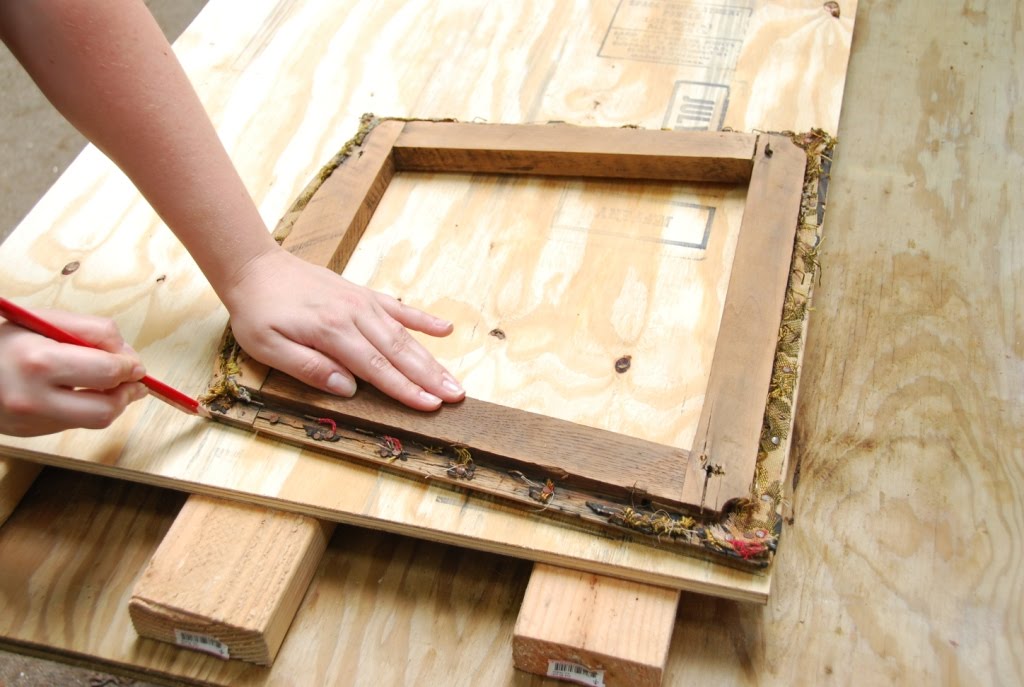
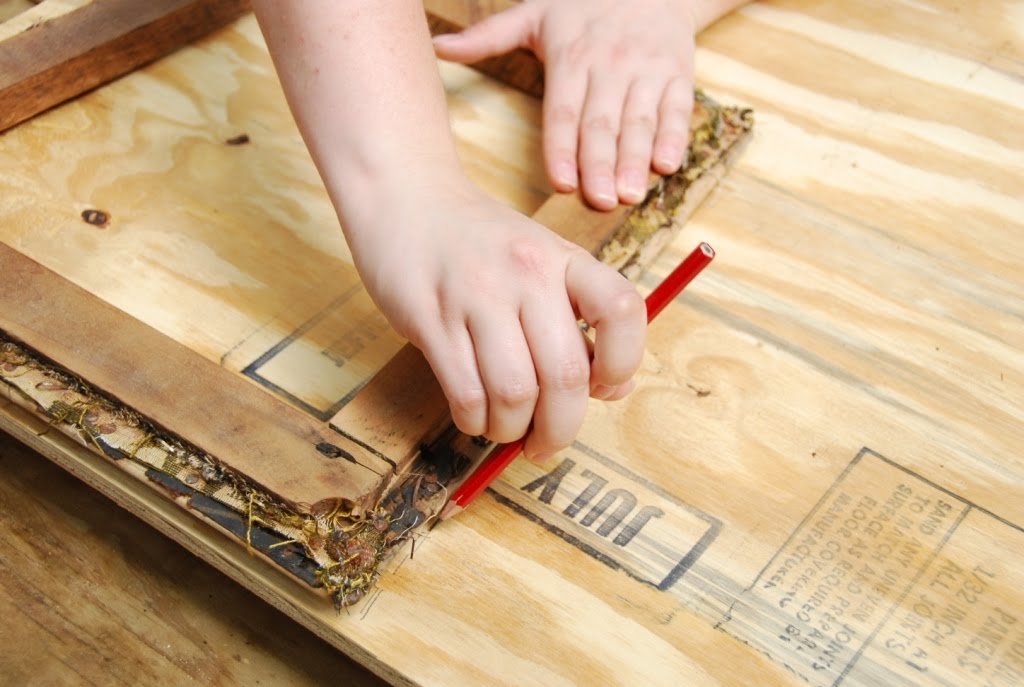
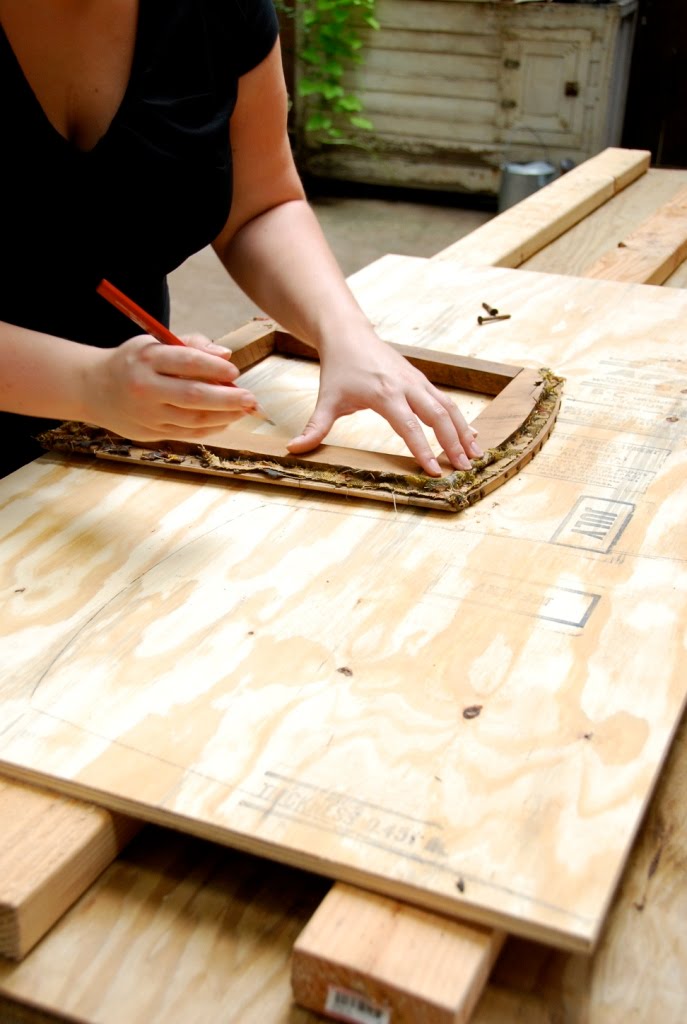
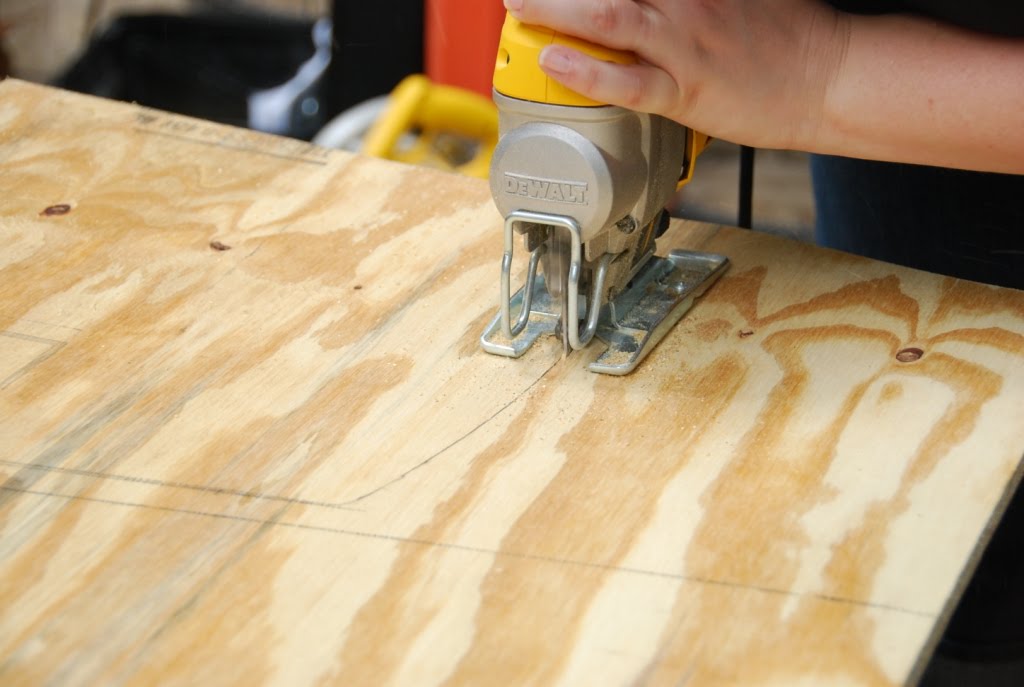
I used the old chair bottom as a template for the new ones. Simply trace an outline of the perimeter of the seat. Repeat for all chairs.
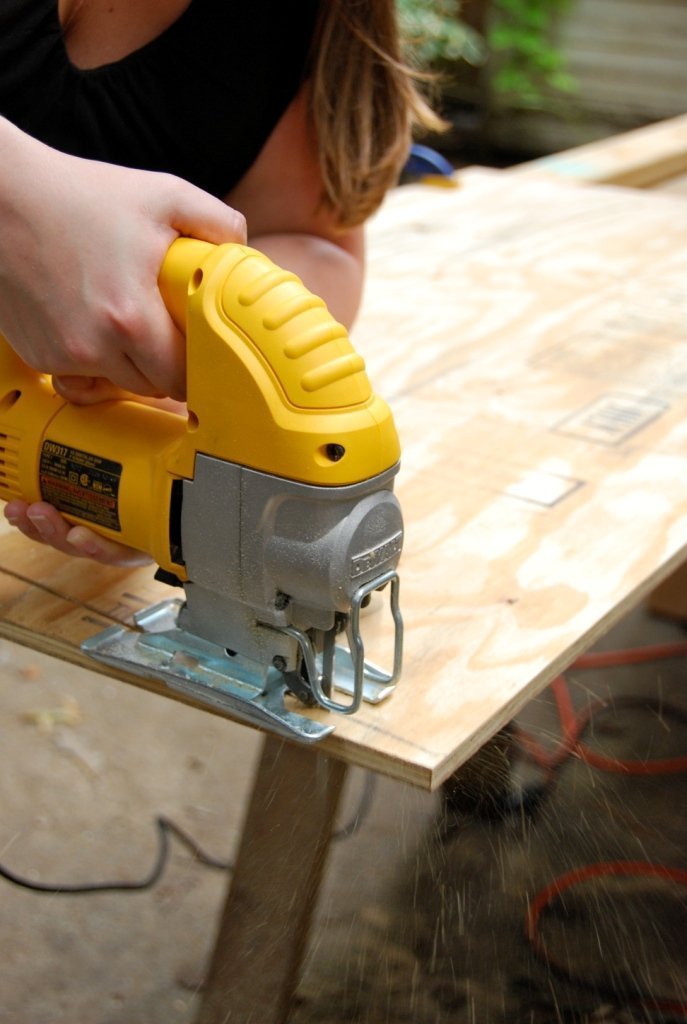
Now, before I say anymore, I must stop to tell you that this was my very first time using power tools.
Did I have a little bit of coaching from my Mister? Yes.
Was it still intimidating? Yes.
Am I dying to use them again? Double yes.
Can you do it? Without a doubt!
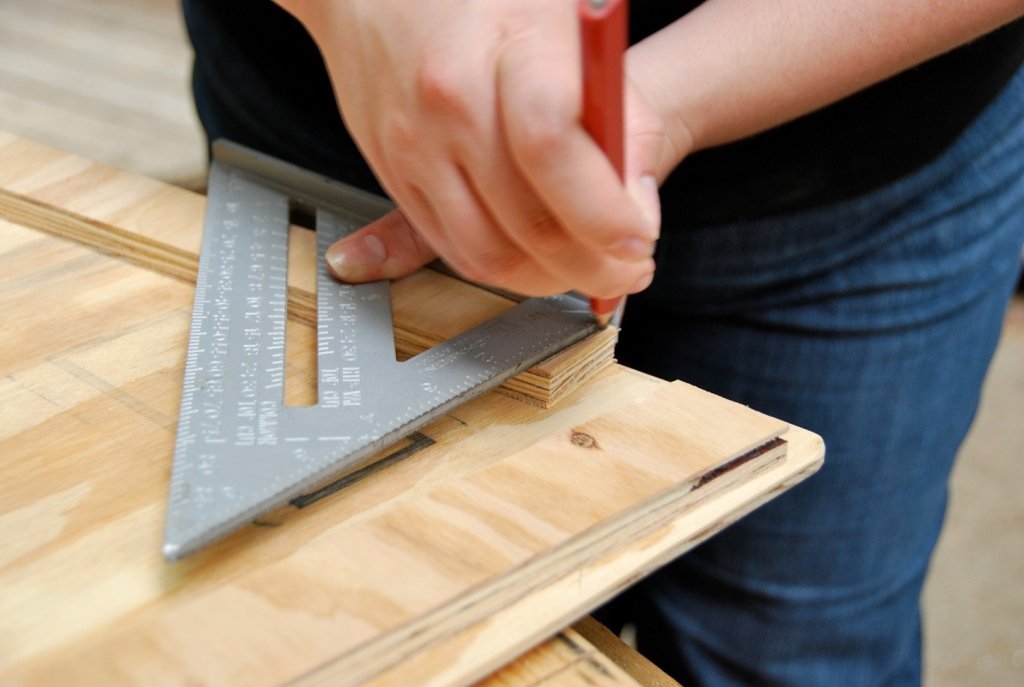
Following the trace lines, I used a jigsaw to cut out the new chair bottom. The back of my chair has a slight radius, so the back of the seat was curved as well.
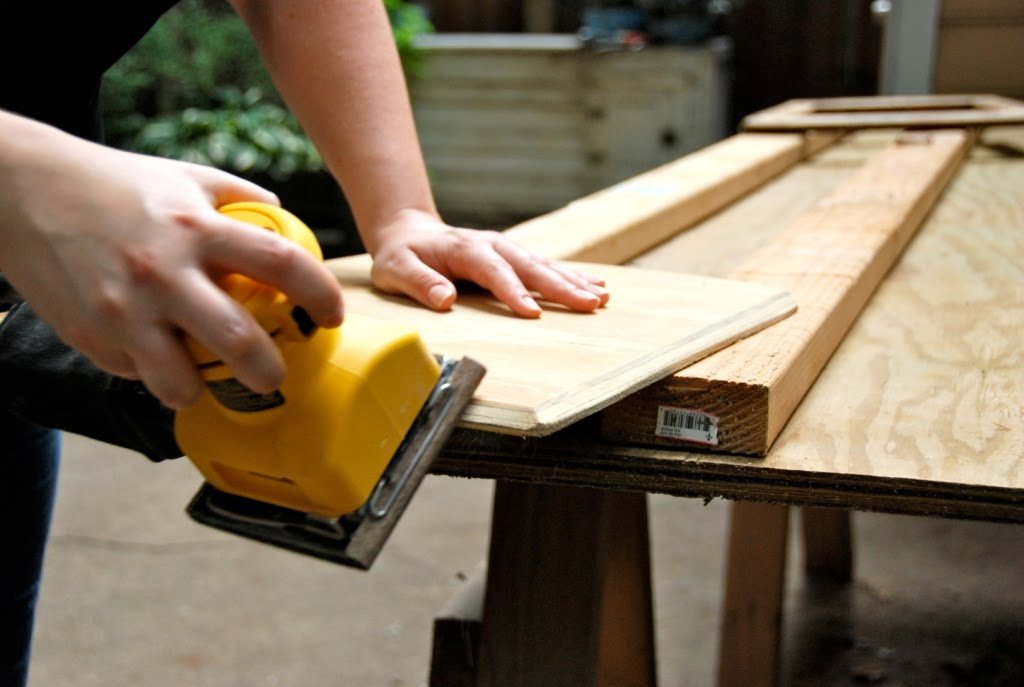
Using a circular saw, I decided to bevel the edges. Then, using an electric sander, I buffed the top, bottom and edges. This was probably my favorite part. I don’t know how I will ever go back to sand paper!
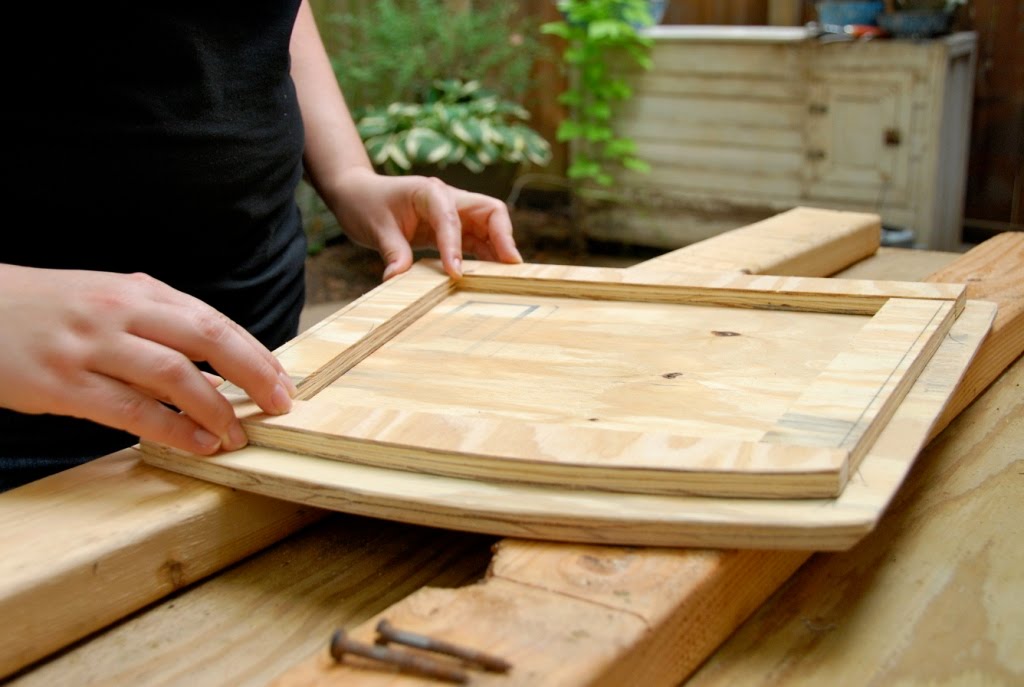
Using a circular saw, I cut 1 ½” strips of wood for the underside of the chair bottom. These pieces actually go inside the frame of the chair, while the seat rests on top of the frame.
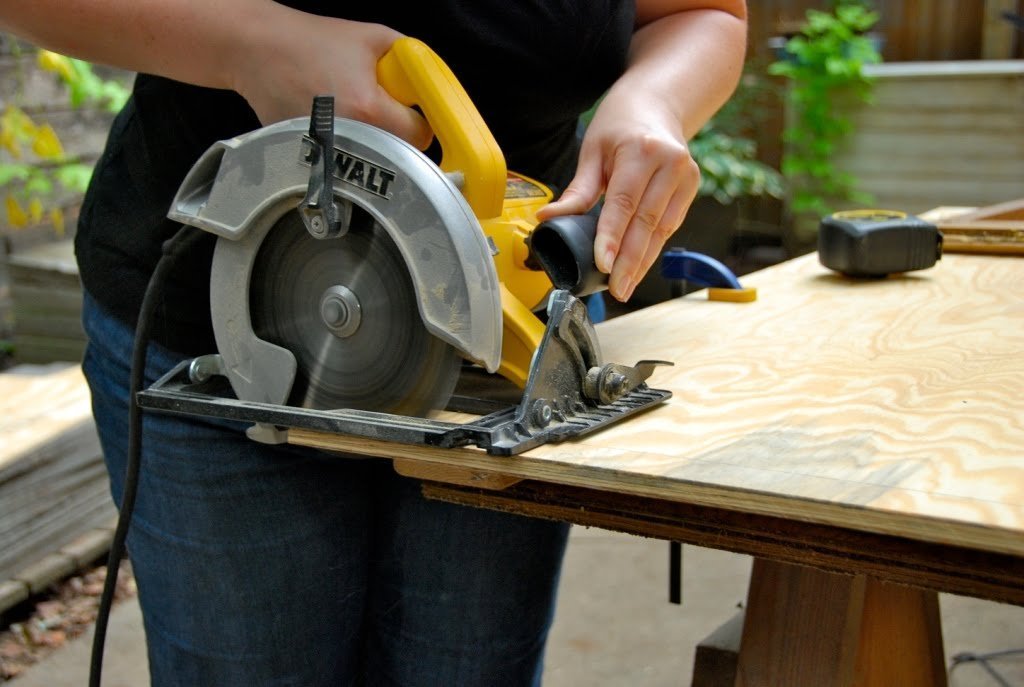
I used a speed square to measure the angles for the strips and then trimmed them with a circular saw so they fit snuggly into the chair frame.
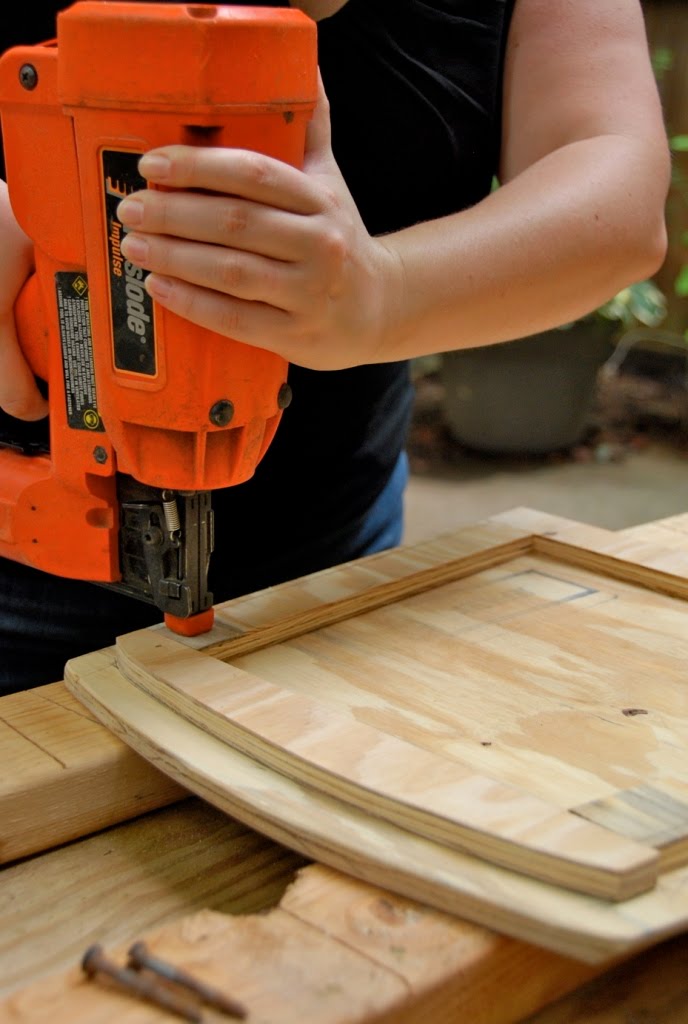
Once the angles were cut, I positioned the pieces on the underside of the chair bottom and brought out the big gun – a pneumatic nail gun – and nailed all of the pieces into place.
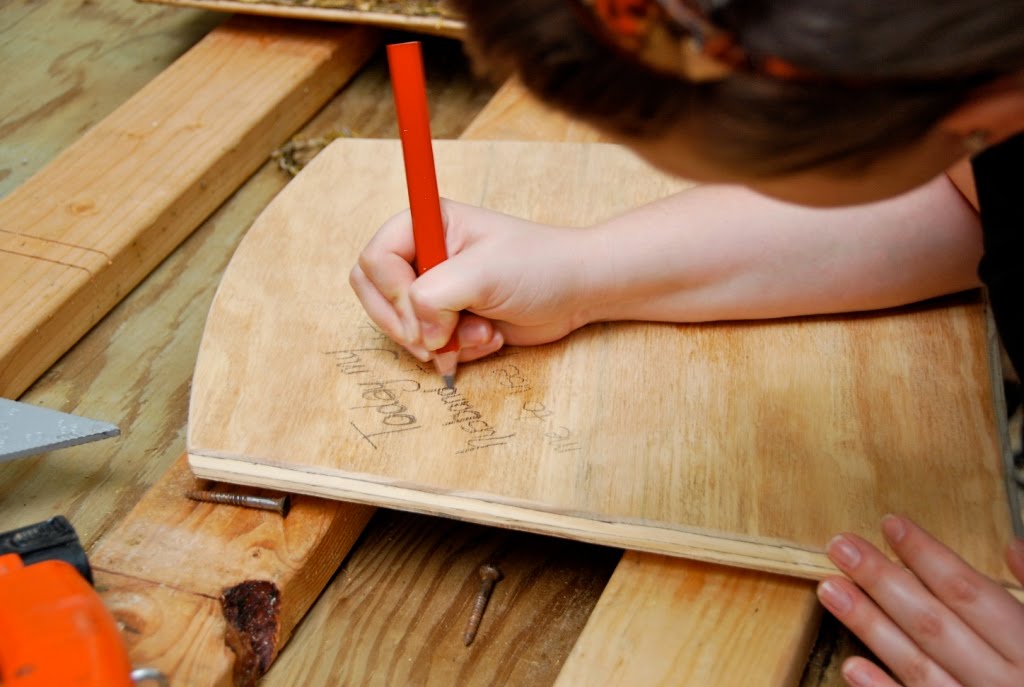
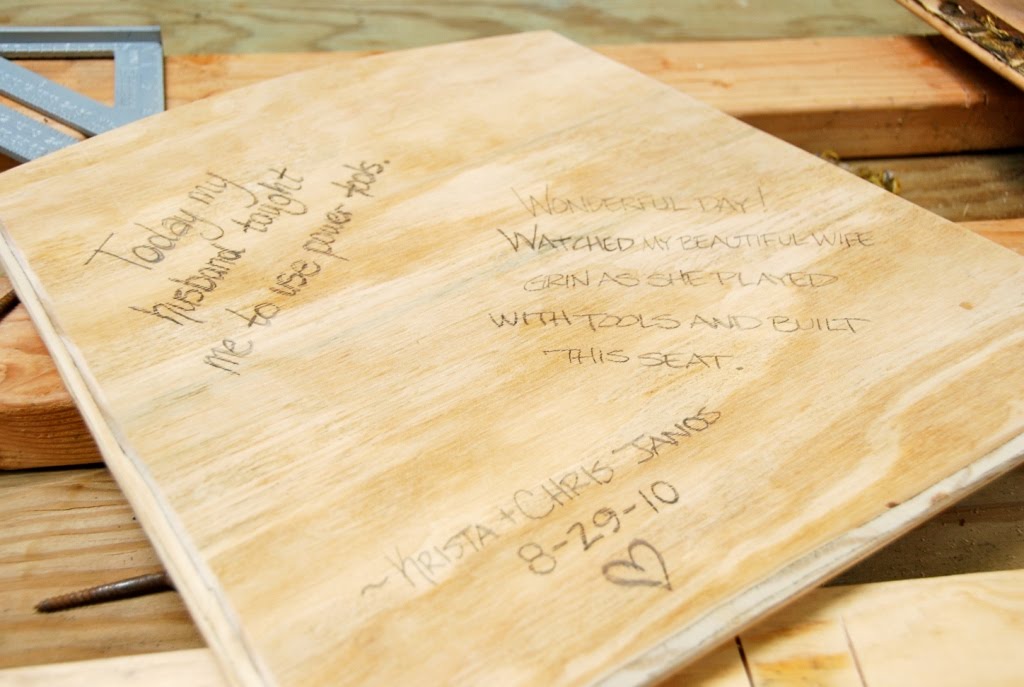
I hope it is a long time before these chair bottoms need replacing. However, if someone down the road decides to give these chairs new bottoms, we thought it would be neat to leave a little message for them to find. Will it be our grandkids that one day find our message? Or perhaps a stranger that snags these chairs at an auction. Either way, we decided to leave a little note, a memory of this day etched onto the chair bottom.
Now that the construction is out of the way, time for a little fluff. Using the newly constructed chair bottom, I traced its shape onto 1” upholstery batting.
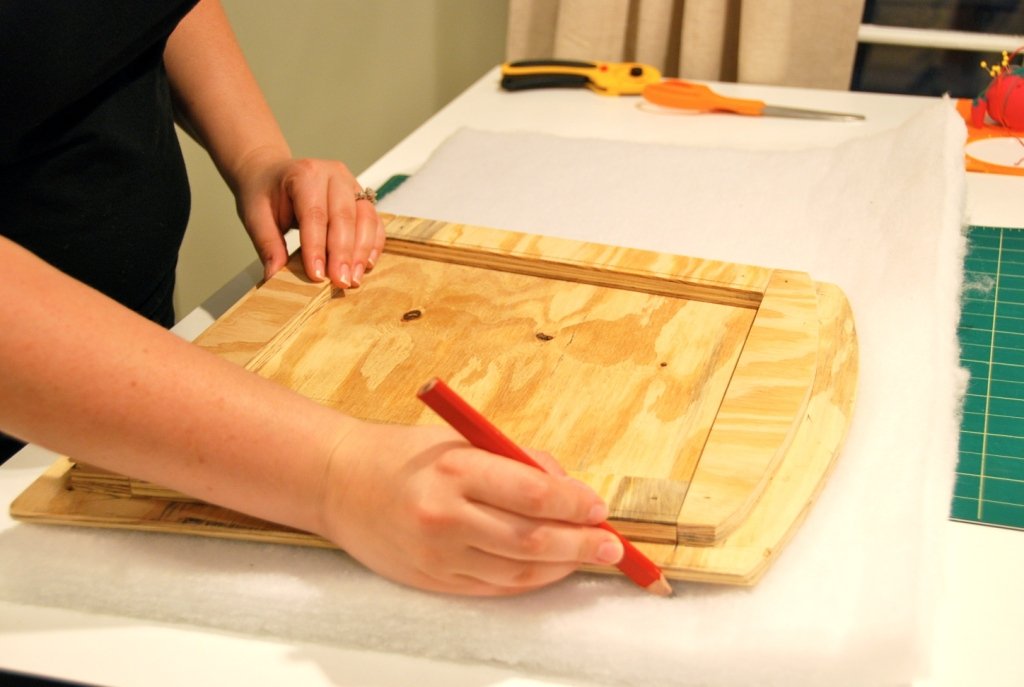
And then cut it to fit the top of the seat.
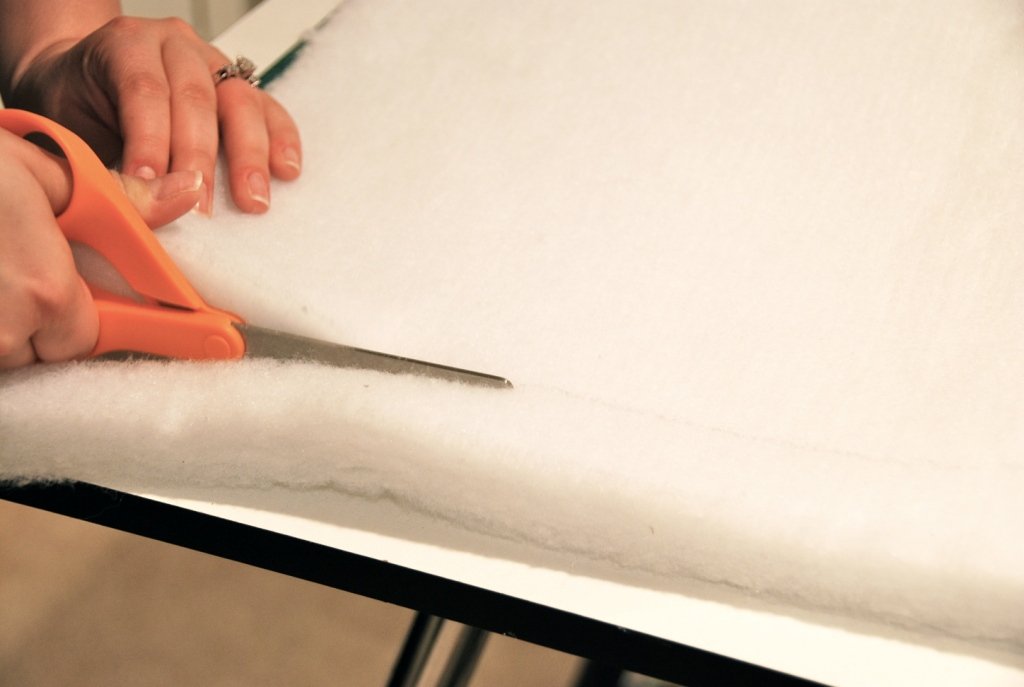
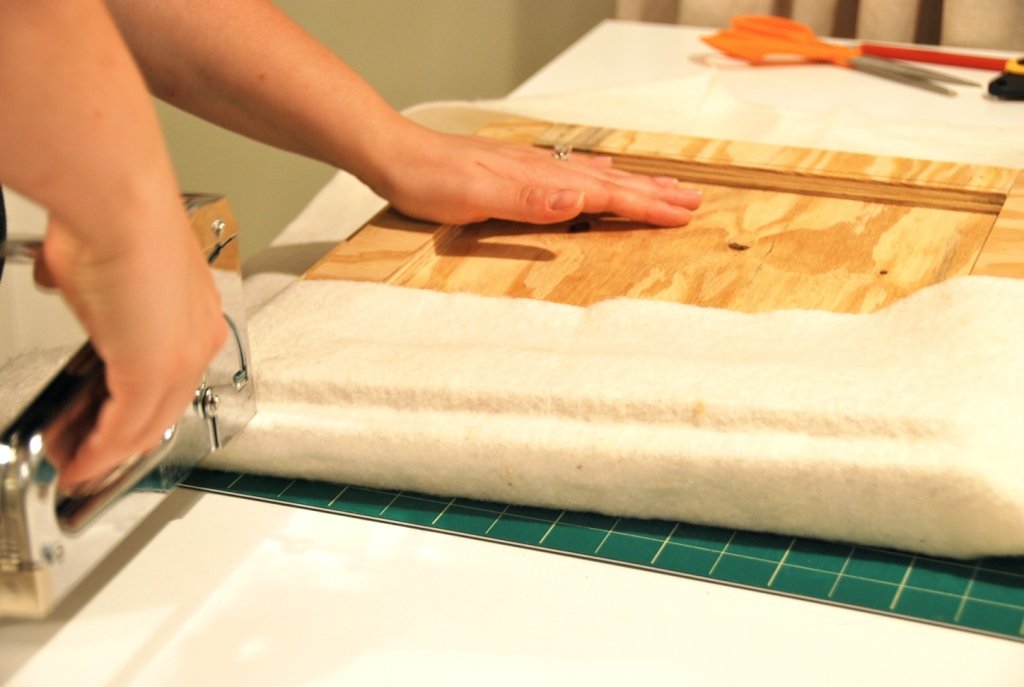
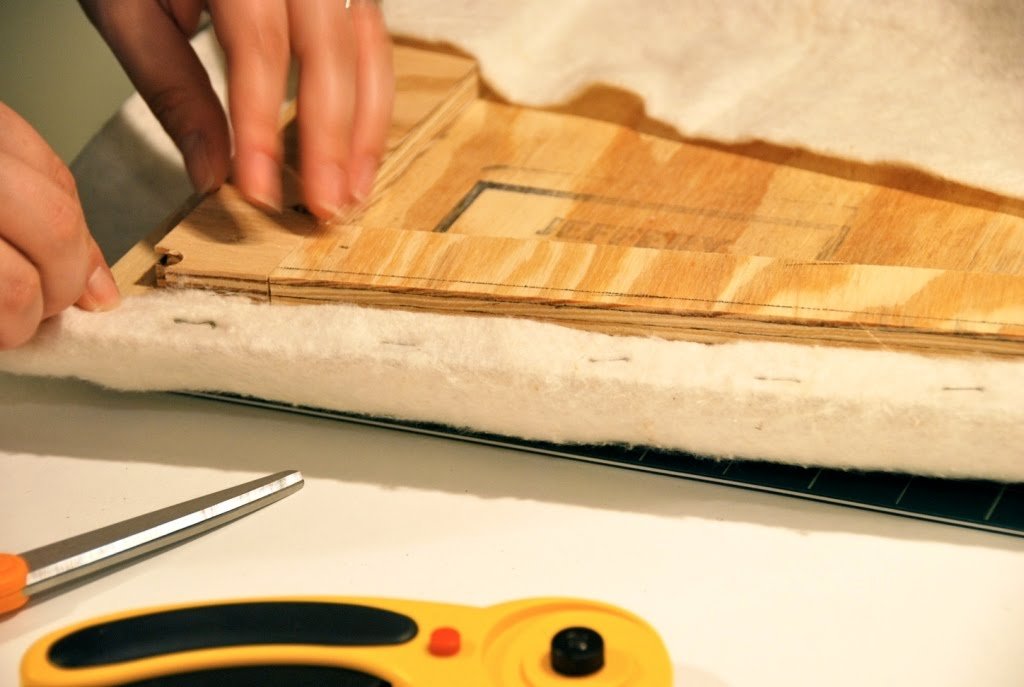
To secure the 1” batting to the chair bottom, I wrapped it with a thinner, organic batting made from soybeans.

Pull the edges taught and staple into place using a staple gun. I stapled this separate from the actual upholstery fabric to allow the fabric to later be changed while keeping the batting in place.
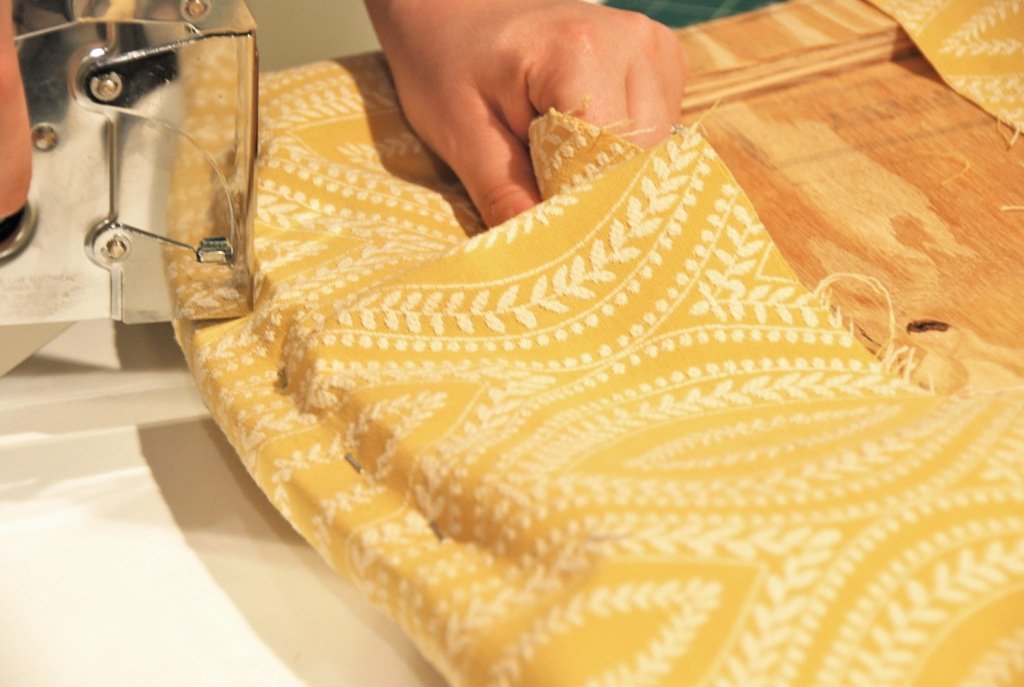
Next I measured and cut the upholstery fabric to size.
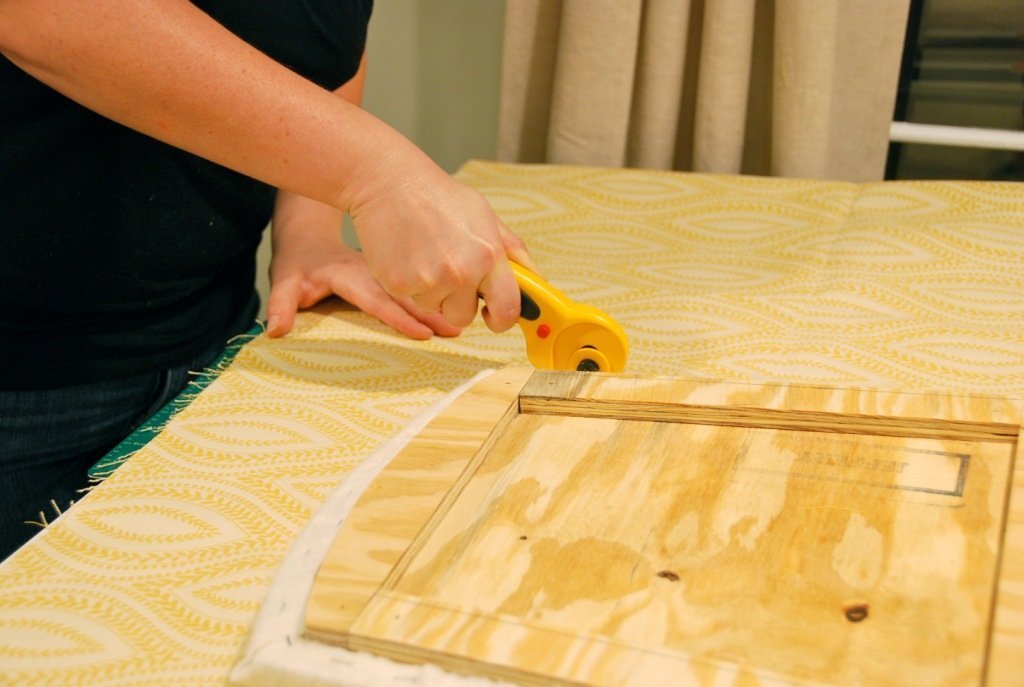
Position the fabric on the seat, making sure to evenly align any patterns or shapes. Pull fabric taught and staple into place with a staple gun. Be sure to use enough staples to prevent puckering of the fabric. Trim off excess material.
Now, pop that new seat into your chair and you’re done! Well almost, don’t forget to screw the underside into place with the original placement screws.
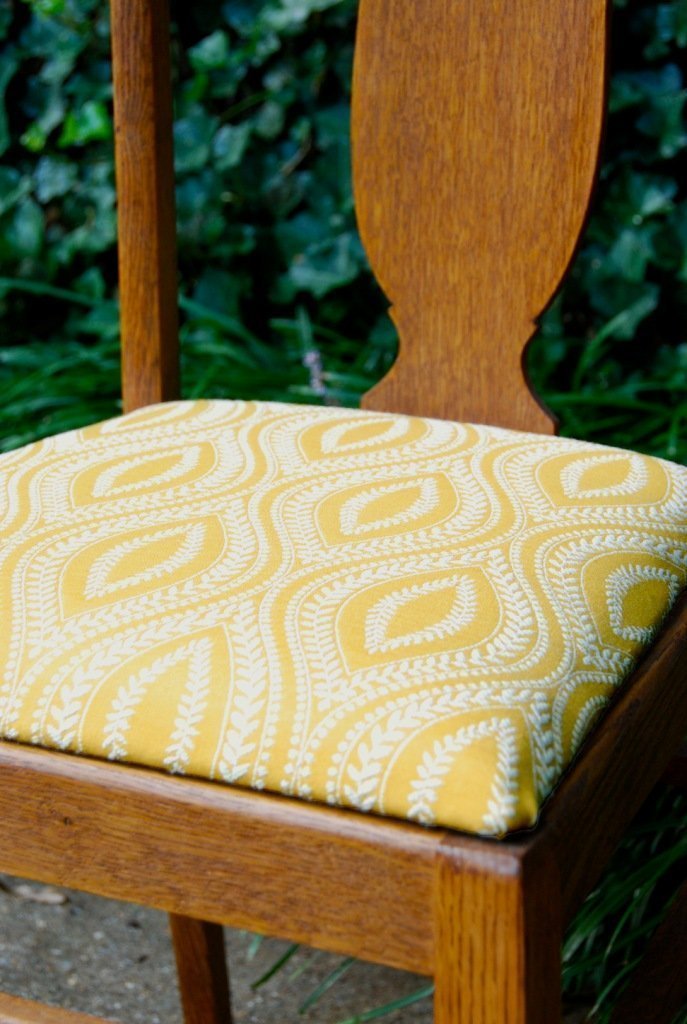
Voila!
Thanks Krista! How cute is she? I LOVE the note writing on the bottom of the seat. You can see more of Krista and her cuteness here. I know I learned a lot. If you would like to be a guest on Sew Homegrown you can find my email in the Contact Me section. I am always looking for new guests!