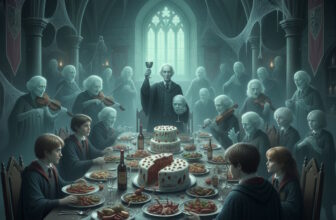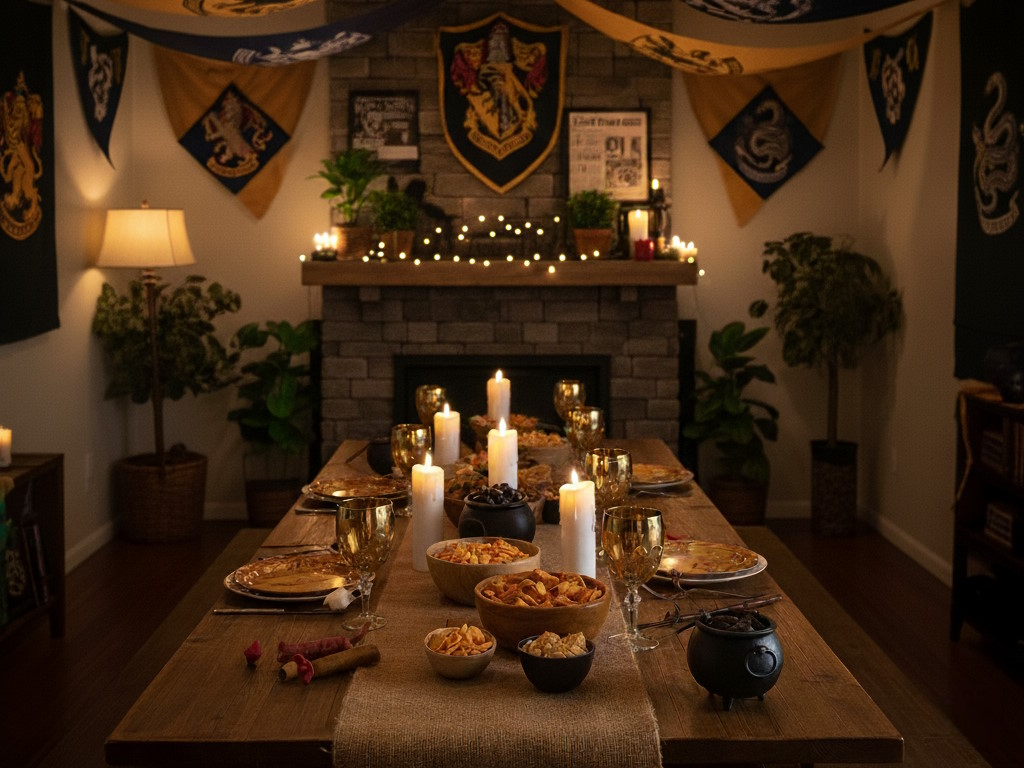
Planning a Hogwarts-at-home celebration? These Harry Potter party decoration ideas are designed for real spaces and real budgets—think renter-friendly, quick to assemble, and photogenic without pro gear. We focus on the highest-impact zones guests notice first: a welcoming entry (Sorting Station), a Great Hall vibe with floating candles and house banners, an eye-catching Daily Prophet wall, interactive “classroom” corners like Potions and Herbology, a sweet-shop moment with Honeydukes, and a built-in photo op at the Azkaban mugshot booth. Each setup scales from a 15-minute quick version to a deluxe build, uses easy-to-find materials, and stays kid-safe with battery lights and removable adhesives.
Use the list to mix and match based on your room size, time, and budget. If you only do two or three features, prioritize lighting (floating candles), a statement wall (Daily Prophet or house banners), and one interactive station (Butterbeer Bar or Potions). Those layers—light, story, and a hands-on moment—create instant Hogwarts energy without overwhelming your space.
1. Floating LED Candles (Great Hall Ceiling)
DIY paper-tube “candles” with LED tea lights hung on fishing line create instant Hogwarts ambience that’s warm, safe, and super photogenic.
At a glance
- Space: any room with a flat ceiling • Time: 20–40 min • Difficulty: Easy • Kid-safe
Materials
- TP/KT paper tubes (10–24), hot glue (drippy “wax”), battery tea lights
- Fishing line, clear tape, removable ceiling hooks (Command™) or pushpins
- Optional: off-white spray paint; remote-control tea lights for on/off
Quick build
- Make bodies: Drip hot glue around tube tops to mimic wax. Pop a tea light in each tube.
- Thread: Poke 2 opposite pinholes near the rim; tie fishing line to hang vertically.
- Grid: Place removable hooks on ceiling roughly 30–50 cm / 12–20″ apart.
- Hang: Vary heights (15–60 cm / 6–24″ drop). Turn on lights.
Deluxe add-ons
- Spray tubes ivory before gluing; add subtle brown “soot” with a dry brush.
- Use a second line to prevent spin if drafts are an issue.
Safety & accessibility
- No real flames. Keep head clearance > 200 cm / 78″ in walkways.
Troubleshooting
- Candles tilt: Add a coin inside base for weight.
- Hooks fall: Degrease ceiling with isopropyl; press 30 sec.
Pack-down
- Store tubes upright in a shoebox; keep spare batteries taped inside lid.
2. House Banners (Instant Hogwarts Walls)
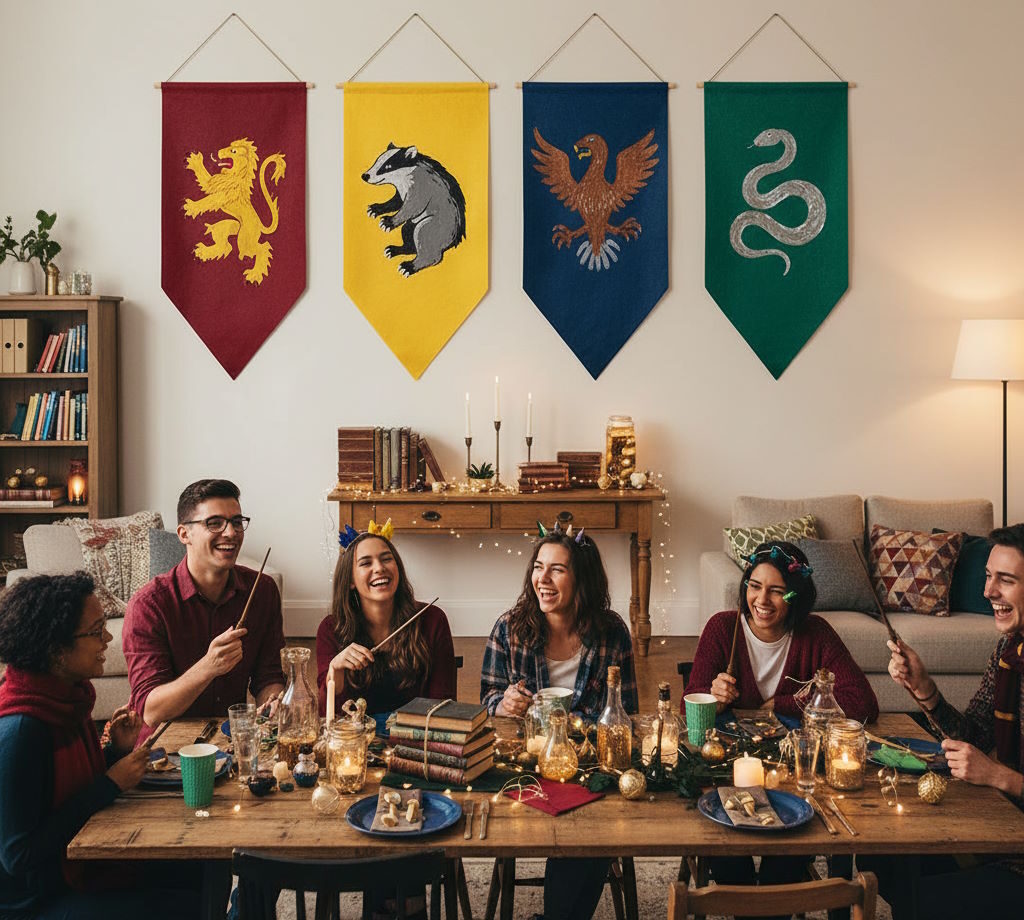
Felt pennants in red, green, blue, and yellow with simple crests quickly define zones and add bold color without repainting or drilling.
At a glance
- Space: any blank wall • Time: 15–30 min • Difficulty: Easy
Materials
- Felt or fabric (red, green, blue, yellow) 50×90 cm / 20×36″ each
- Printed crests, glue or double-sided tape, dowels, cord/twine
- Optional: pinking shears for zig-zag tails; heat-bond for clean edges
Quick build
- Cut pennants: Rectangles or swallowtail.
- Crest: Print and glue centered (or iron-on transfer).
- Hang: Fold top over a dowel and tape/heat-bond; hang on two nails or Command™ hooks.
Deluxe add-ons
- Sew a proper rod pocket; add gold cord fringe and tassels.
Troubleshooting
- Fabric curls: Light steam iron; use interfacing strip at top.
Pack-down
- Roll around the dowel; slip into a mailing tube.
3. Daily Prophet Feature Wall
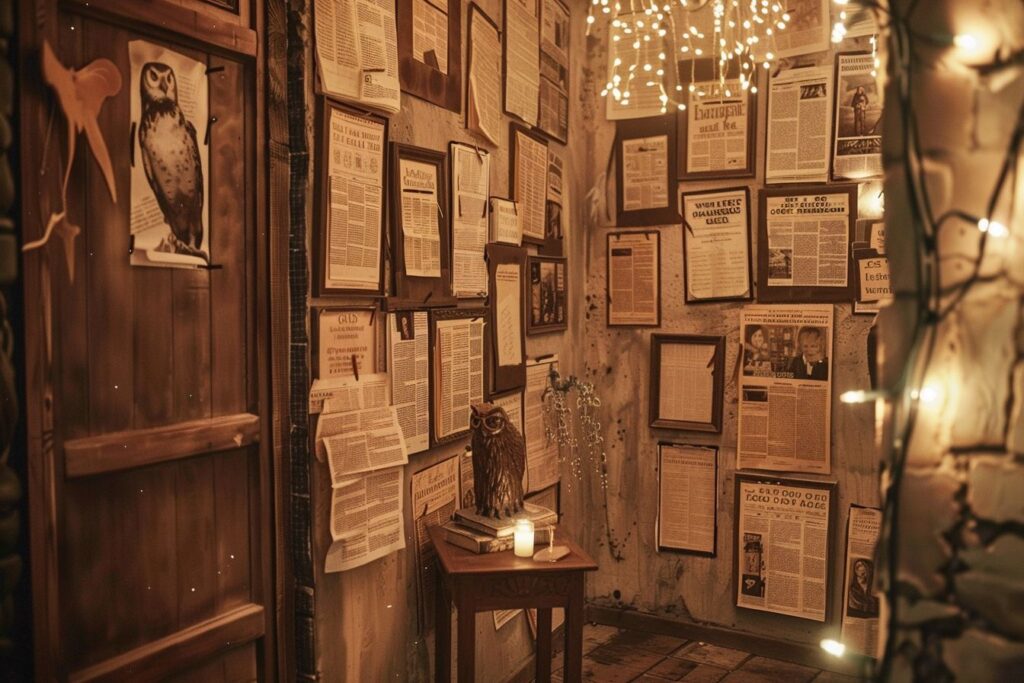
A tight collage of faux wizard newspapers becomes a dramatic statement backdrop and conversation starter for photos.
At a glance
- Space: 1.2–2 m wide section • Time: 30–45 min • Difficulty: Easy
Materials
- 12–24 printed “front pages” (A4/Letter), masking/painter’s tape
- 1–2 headline posters (A3/Tabloid) for center, optional fairy lights
Quick build
- Layout on floor: Create a tight grid with small overlaps.
- Mount: Start from center outward, keeping rows straight with a level or a long ruler.
- Edge: Frame with a thin strip of black tape for a “newsstand” look.
Deluxe add-ons
- Hide a Bluetooth speaker behind playing quill scratches and murmurs.
- Add a “Moving Photos” gag: clip a small tablet looping GIFs.
Troubleshooting
- Paper waves: Use painter’s tape on all four corners; press firmly.
Pack-down
- Stack pages in order; store flat in a large zip folder.
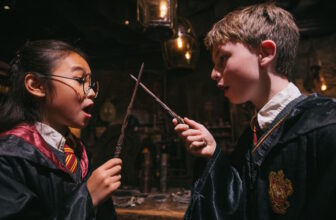
4. Sorting Station (Arrival Icebreaker)
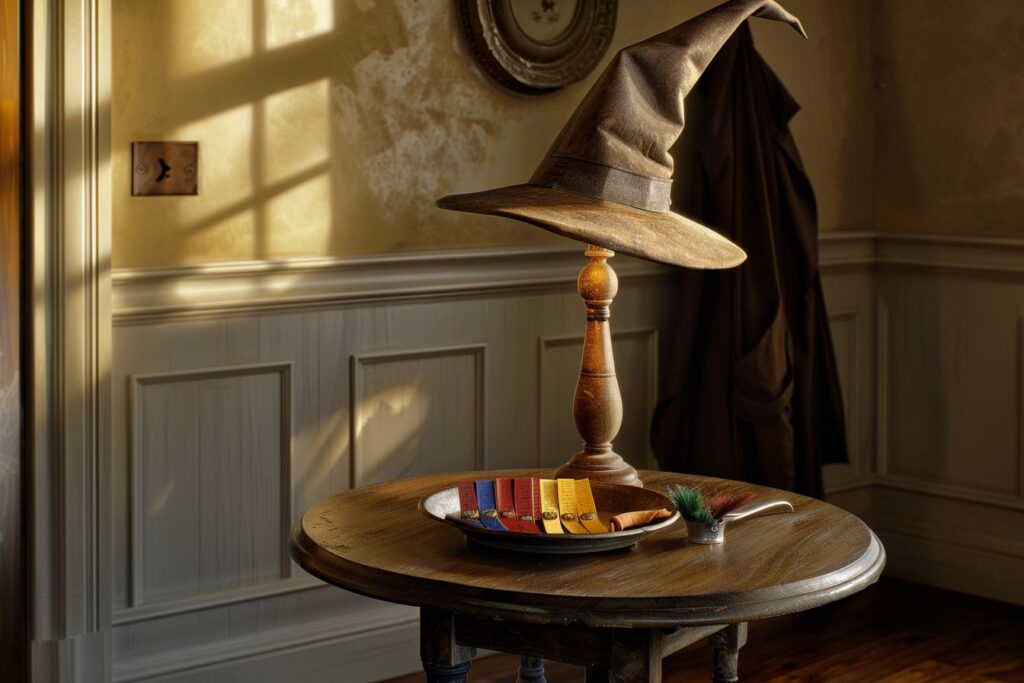
A hat on a stool plus house badges turns the doorway into a fun mini-ceremony that eases arrivals and gets everyone “sorted.”
At a glance
- Space: entry nook • Time: 20–30 min • Difficulty: Easy
Materials
- Stool, Sorting Hat (store-bought or DIY), name tags or ribbon badges
- Small sign “Sorting at Arrival,” shallow basket for tags
Quick build
- Stool & hat: Place under a warm lamp for a spotlight effect.
- Badges: Pre-sort equal sets for four houses; guests pick when “sorted.”
- Flow: Put the sign at eye level so arrivals stop here first.
Deluxe add-ons
- Hidden speaker with recorded “sorting” lines.
- Polaroid/Instax for instant house photo keepsakes.
Troubleshooting
- Congestion: Move the station 1–2 m inside the door so the entry stays clear.
Pack-down
- Keep leftover badges rubber-banded by house for reuse.
5. Butterbeer Bar (Hot/Cold/Sparkling)
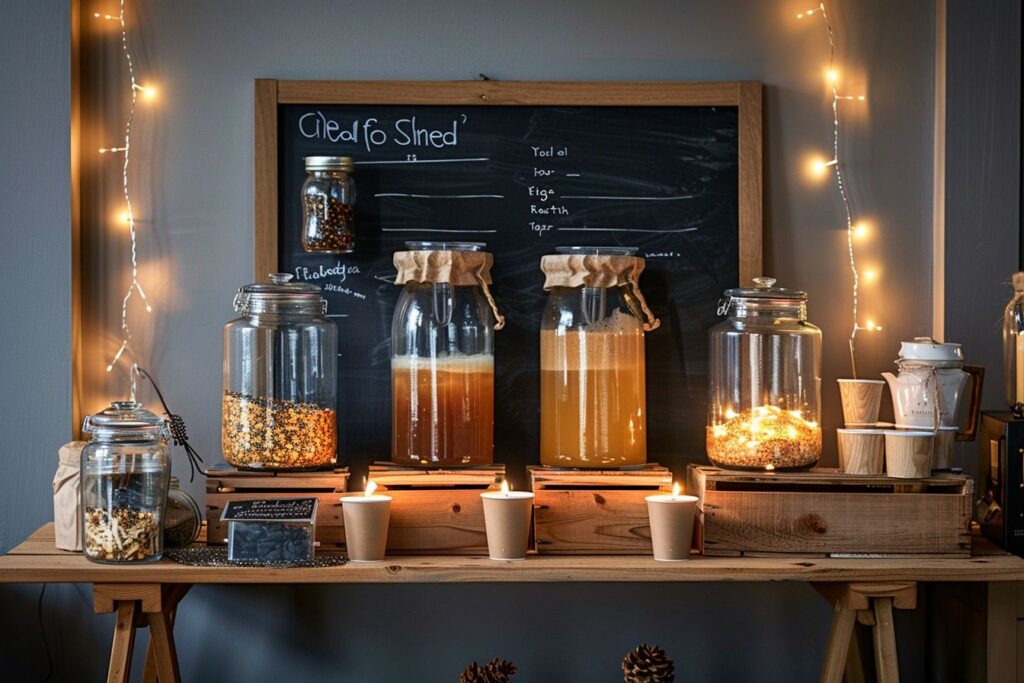
Three easy drink variations with a chalkboard menu and toppings deliver an interactive refreshment station guests love.
At a glance
- Space: 120–160 cm / 4–5′ buffet • Time: 30–60 min • Difficulty: Easy
Materials
- Crates/risers, chalkboard menu, glass drink dispensers or pitchers
- Clear cups, ladle, napkins; labeled syrups/toppings (butterscotch, cream foam, cinnamon)
- Optional: warm urn/kettle for hot version, string lights
Quick build
- Z-levels: Use crates for height; place “Classic Cold,” “Hot,” “Sparkling.”
- Menu: Simple chalkboard with 3 variations + toppings.
- Traffic: Cups left → drinks middle → toppings right → napkins end.
Deluxe add-ons
- Pre-mix syrups in small “potion” bottles with labels (Felix Felicis = caramel, etc.).
- Add a bar runner and wipe station for spills.
Safety
- Hot urn at back; keep cords taped and out of footpaths.
Troubleshooting
- Foam collapses: Whip heavy cream + marshmallow fluff; spoon on top per cup.
Pack-down
- Empty dispensers; store labels in a zip bag titled “Butterbeer Bar.”
6. Potions Class Vignette
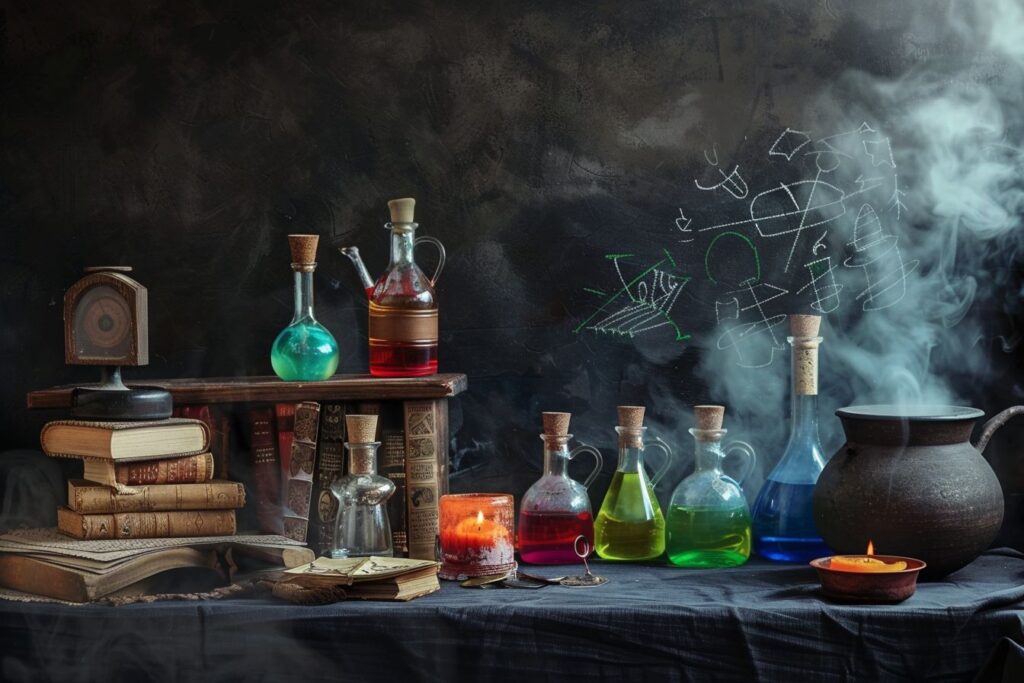
Glass bottles, a small cauldron, and gentle fog build a moody photo-ready corner that looks elaborate but sets up fast.
At a glance
- Space: 90–120 cm / 3–4′ table • Time: 25–45 min • Difficulty: Easy
Materials
- Black tablecloth, 3–5 glass bottles with food-colored water, 1–2 cauldrons
- Dry ice bowl or small fog machine, tongs, “restricted” sign
Quick build
- Backdrop: Hang a black cloth or chalkboard behind the table.
- Arrange: Tall bottles at back, cauldrons front/center.
- Effect: Add a dry-ice bowl (adult-handled) or fog machine behind cauldron.
Deluxe add-ons
- LED puck under a frosted bowl for glowing “pensive.”
- Old books stack + quill in inkwell.
Safety
- Dry ice: adult use only; no direct touch; label clearly. Keep cords taped.
Troubleshooting
- Fog too heavy: Elevate the bowl; add a small fan for drift.
Pack-down
- Empty bottles; rinse food color; store labeled “Potions Props.”
7. Herbology Greenhouse (Baby Mandrakes)

Terracotta pots, printable tags, and playful “mandrakes” add bright greenery and kid-friendly whimsy to any shelf or sideboard.
At a glance
- Space: sideboard or window ledge • Time: 30–60 min • Difficulty: Easy
Materials
- 3–6 small terracotta pots, potting soil or brown tissue, faux plants
- Printable plant tags; gloves and “earmuff” props
- Optional: DIY baby “mandrakes” (polymer clay or root-shaped toy plants)
Quick build
- Pots: Fill with crumpled brown tissue; tuck greenery/cacti.
- Tags: “Fluxweed,” “Aconite,” “Baby Mandrake (Do Not Disturb).”
- Props: Place gloves and earmuffs on hooks above.
Deluxe add-ons
- Sculpt simple mandrake faces from air-dry clay; dust with brown chalk.
Safety
- Avoid real toxic plants if kids present.
Troubleshooting
- Looks flat: Mix heights (books under pots); vary leaf shapes.
Pack-down
- Wrap pots in paper; store tags flat in an envelope.
8. Honeydukes Candy Bar
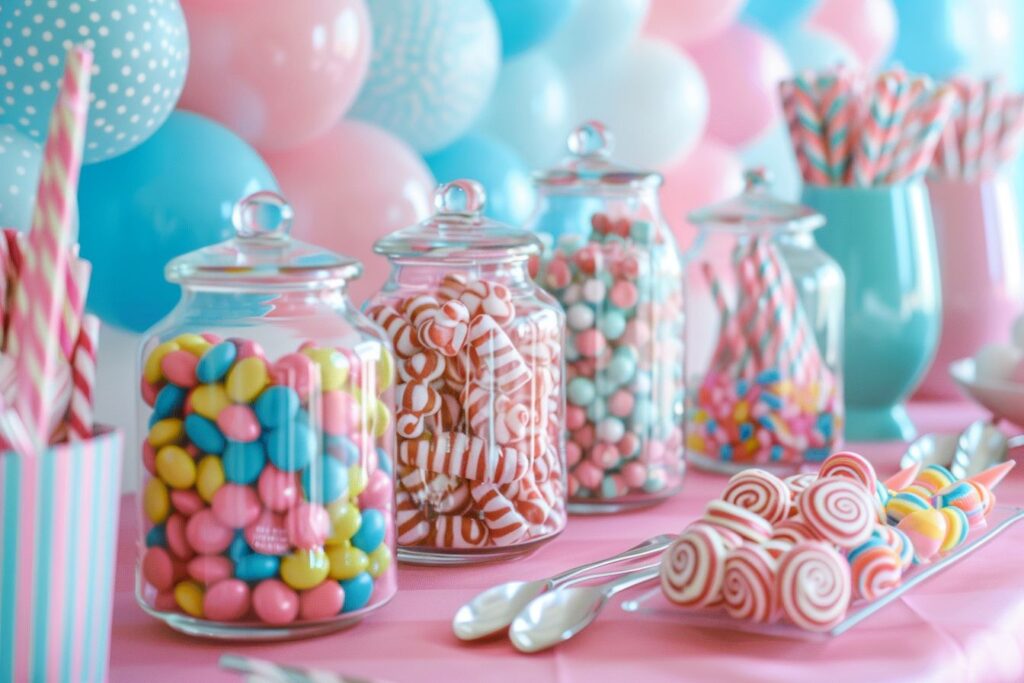
Clear jars, scoops, and treat bags give you a pastel sweet-shop moment that doubles as décor and dessert (add allergy notes if needed).
At a glance
- Space: 100–150 cm / 3–5′ table • Time: 30–60 min • Difficulty: Easy
Materials
- 6–10 clear jars with scoops/tongs, striped runner or backdrop
- Labels: Chocolate Frogs, Fizzing Whizbees, Bertie Bott’s Beans, Acid Pops (lollies)
- Treat bags or cups
Quick build
- Backdrop: Tape a pink/green stripe poster or fabric behind.
- Jars: Tall at back, small front; place labels at eye level.
- Flow: Left to right—bags → jars → tongs → check-out (photo spot!).
Deluxe add-ons
- DIY Chocolate Frog boxes (printables) stacked as decor.
- Mini cake stands for height breaks.
Safety
- Nut and allergy signage if needed.
Troubleshooting
- Label glare: Matte tape or cardstock tents instead of glossy.
Pack-down
- Seal leftover sweets; store labels in “Honeydukes” folder.
9. Marauder’s Map Floor Runner

A kraft-paper runner hand-drawn with corridors and footprints guides traffic while adding storybook charm—just tape edges flat for safety.
At a glance
- Space: corridor 2–4 m • Time: 30–50 min • Difficulty: Easy
Materials
- Kraft paper roll (30–60 cm / 12–24″ wide), black markers, painter’s tape
- Optional: tea staining (lightly), footstep decals
Quick build
- Cut length: Match corridor, leaving 5–10 cm / 2–4″ short of doorways.
- Draw: Simple corridors/footsteps, labels like “Great Hall,” “Dungeons.”
- Tape down: Painter’s tape every 60–90 cm / 24–36″; edges flat.
Deluxe add-ons
- Light tea-stain wash; crinkle then flatten for aged texture.
- Add “I solemnly swear…” at the start and “Mischief managed.” at the end.
Safety
- Keep edges fully taped to prevent tripping.
Troubleshooting
- Paper buckles: Use heavier kraft or two parallel strips overlapped and taped.
Pack-down
- Roll around a tube; label and store vertically.
10. Azkaban Mugshot Photo Booth
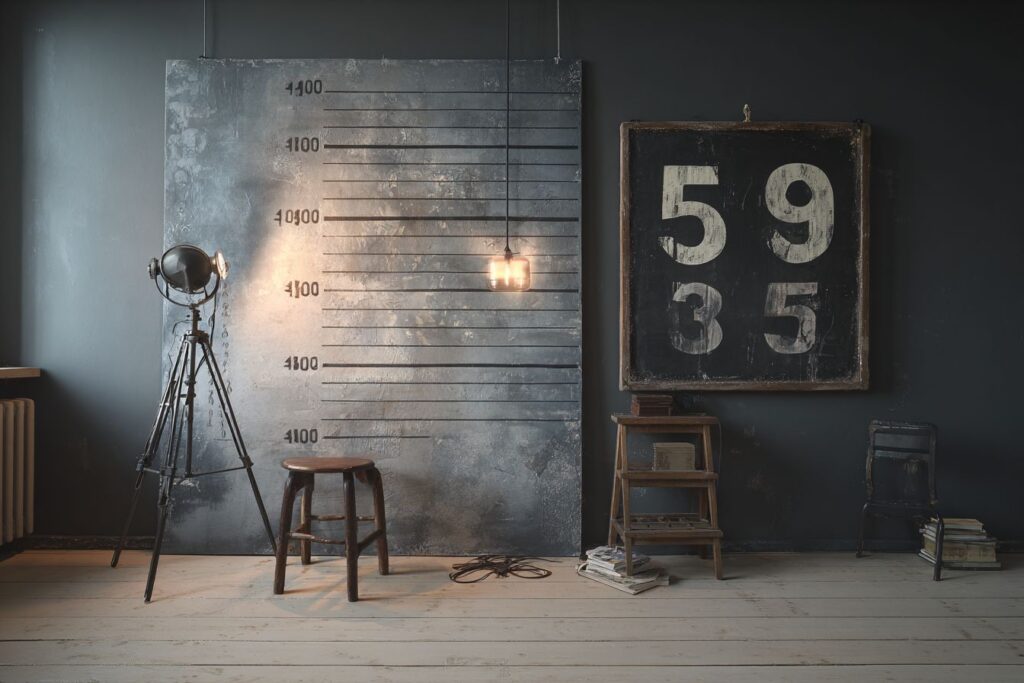
A simple height chart and prisoner placard create a guaranteed-laughs photo spot that works in tight spaces and low light.
At a glance
- Space: 1.2–1.5 m / 4–5′ wide wall • Time: 25–45 min • Difficulty: Easy
Materials
- Height chart (printed or drawn), black foam board for prisoner number plate
- White stick-on letters/numbers, tape; optional ring light or lamp
Quick build
- Back wall: Tape height chart (mark 1.2–2.0 m / 4–6.5′).
- Number plate: Foam board 30×45 cm / 12×18″; apply letters (e.g., “AZKABAN PRISON” + code).
- Camera mark: Floor tape X for where to stand; ring light slightly above eye level.
Deluxe add-ons
- Print two side-profile arrows: “FRONT” and “SIDE” and shoot both angles.
- Add a “Wanted” frame prop for variety.
Safety & flow
- Keep the walkway behind the camera clear 1.5 m / 5′.
- Wipe the number board between guests if you use chalk markers.
Troubleshooting
- Photos too dark: Bounce a lamp off the ceiling; avoid direct harsh light.
Pack-down
- Store letters in a zip bag; number board in a flat box.
Final Thoughts
A magical room isn’t about cramming in every reference; it’s about flow and layers. Map your guest path from entry to photo spot to refreshments, then add three simple ingredients: warm lighting, clear signage, and one tactile detail per zone (a badge to wear, a scoop to use, a prop to hold). Keep sightlines clean, secure edges and cords, and leave at least one wide, uncluttered walkway so wizards of all ages can move comfortably.
When the party ends, pack props by zone (labels help: “Great Hall,” “Honeydukes,” “Photo Booth”) so you can reset fast for your next feast. Whether you build the quick versions or go deluxe, these Harry Potter party decoration ideas will give you that cozy, lived-in Hogwarts feel—right in your living room. If you want, tell me your room dimensions and I’ll tailor the setups to exact widths, heights, and quantities.